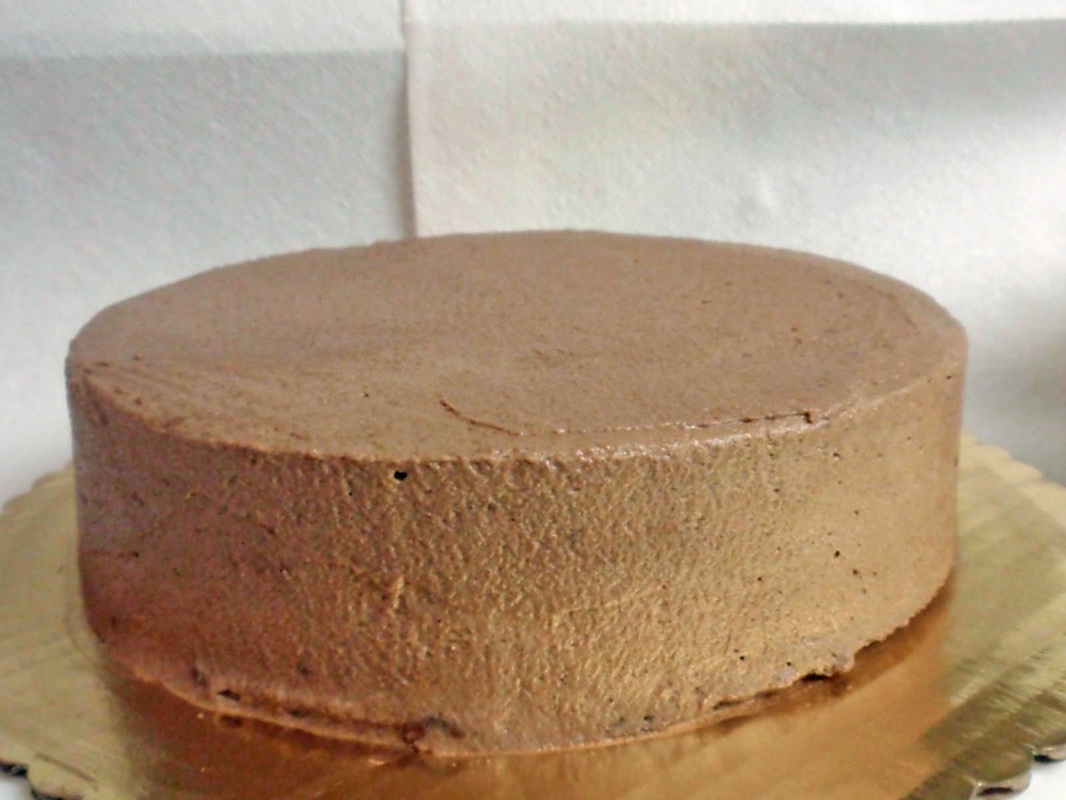
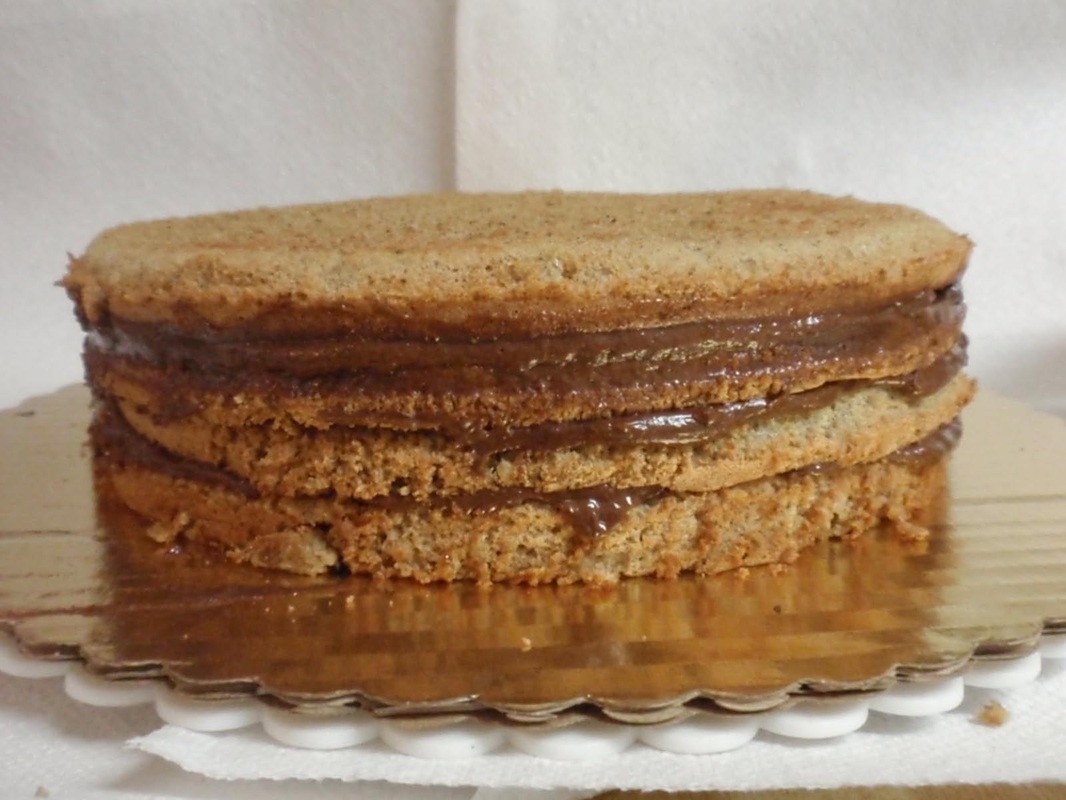
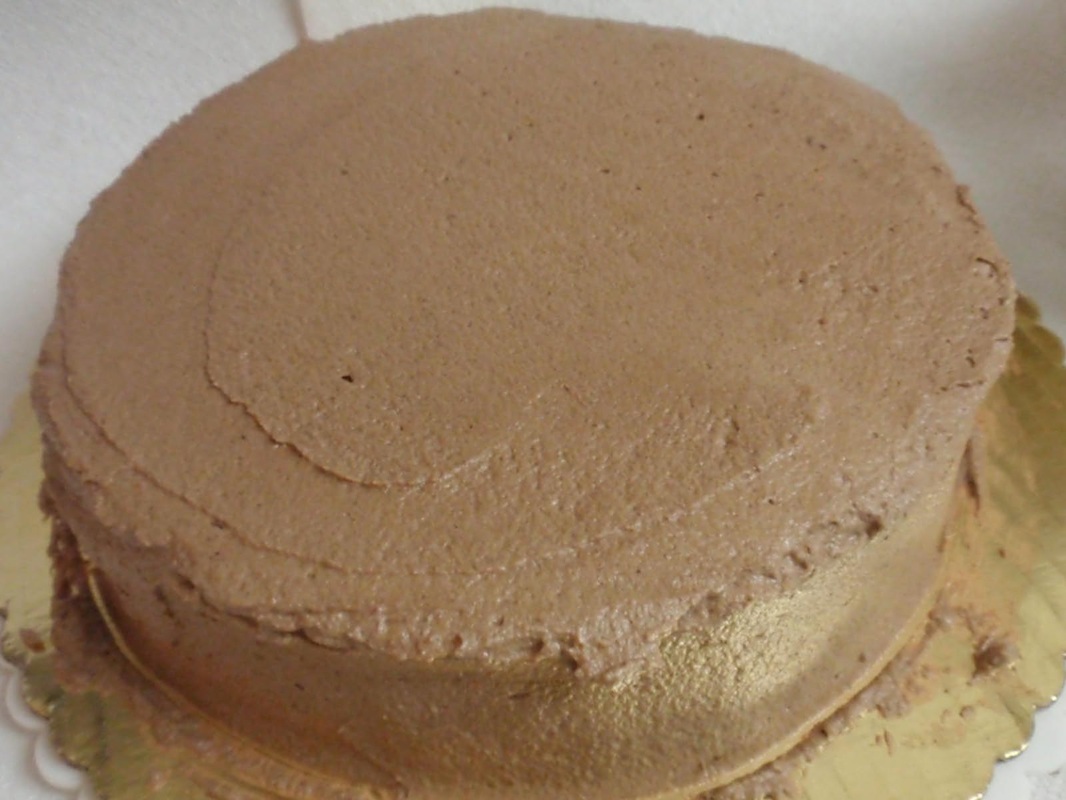
Filled and frosted 4-layer Walnut Torte with Chocolate-Praline filling, before decorating.
I've had friends ask if they could come and bake a torte with me, to see step by step how to do it. But distances are long in our Ukrainian community, schedules are tight, and we've never been able to make it happen. So I thought I would do a blog entry on one of the tortes I've often made for pre-order for our Ukrainian School Bake Sale, with step-by-step photos.
I chose this Walnut Torte with Chocolate-Praline filling because it is based on an old recipe I received from my Teta Lesia Khraplyva (the childrens' book author). Teta Lesia's mother, my Teta Baba, was named Evhenia Petryk Khraplyva. As an immigrant living in New York City in the 1950s, Evhenia put together a collection of baked-goods recipes as a name-day gift for her own mother, Maria Hankevych Petryk (my great-grandmother). She collected recipes from numerous friends and acquaintances and typed them up, in the brief recipe style of the time. When I received the collection in 2002, the carbon-copied pages were already falling apart, with pieces missing. I retyped everything into a computer file, filled in missing text where I could, and translated into English. I've tried only a fraction of the recipes in the collection so far, but this one is my favorite.
I chose this Walnut Torte with Chocolate-Praline filling because it is based on an old recipe I received from my Teta Lesia Khraplyva (the childrens' book author). Teta Lesia's mother, my Teta Baba, was named Evhenia Petryk Khraplyva. As an immigrant living in New York City in the 1950s, Evhenia put together a collection of baked-goods recipes as a name-day gift for her own mother, Maria Hankevych Petryk (my great-grandmother). She collected recipes from numerous friends and acquaintances and typed them up, in the brief recipe style of the time. When I received the collection in 2002, the carbon-copied pages were already falling apart, with pieces missing. I retyped everything into a computer file, filled in missing text where I could, and translated into English. I've tried only a fraction of the recipes in the collection so far, but this one is my favorite.
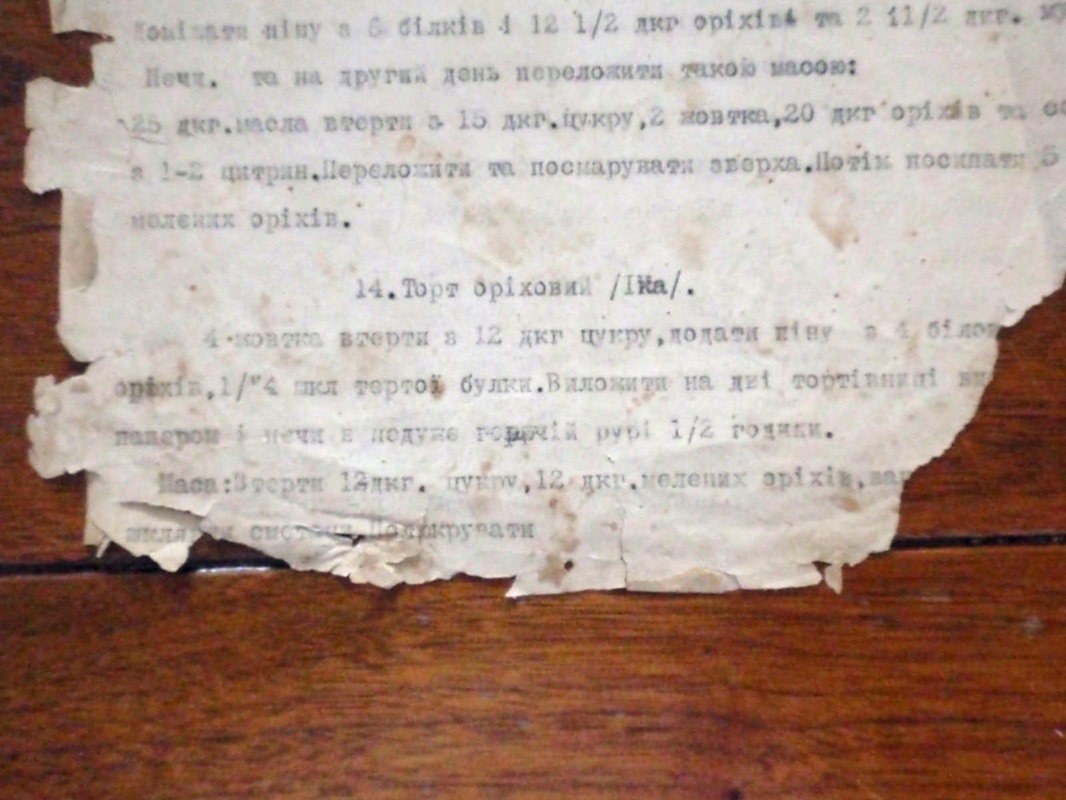
Original recipe typed by my Teta Baba.
Above is a photograph of the original page. The recipe is attributed to "Ika", and Teta Lesia identifies Ika as Sofia Fedak-Melnyk, wife of Andriy Melnyk.
Here is the recipe in Ukrainian (translation is further down):
Торт Оріховий (Іка)
4 жовтки втерти з 12 дкг цукру, додати піну з 5 білок (......) оріхів, 1/4 шкл. тертої булки. Виложити на дві тортівниці ви(мащені маслом і?) папером і печи в недуже гарячій рурі 1/2 години.
Маса: Втерти 12 дкг цукру, 12 дкг мелених оріхів, ван(ілію?...) шклянки сметани. Полюкрувати.
Some key quantities are missing. I've assumed that the quantity of nuts should equal that of the sugar, as that is a frequent pattern in recipes from this era. I've also made my best guess for the sour cream in the filling.
Other notes: "оріхи", "оріховий" would today be written as "горіхи", "горіховий". "Дкг" is the abbreviation for dekagrams, which of course are 10 grams. Many recipes from this time use dekagrams, or simply "deka", as the unit of measurement.
Here's the recipe translated into English, with my best guesses about missing quantities, and in the formatting used in the US these days:
Walnut Torte (Ika)
4 eggs, separated
120 gr sugar (4.2 oz, or about 1/2 c)
120 gr ground walnuts (4.2 oz, or about 1 c)
1/4 c breadcrumbs
(I like to add 1 Tbsp. vanilla extract too)
filling:
120 gr sugar (4.2 oz, or about 1/2 c)
120 gr ground walnuts (4.2 oz, or about 1 c)
dash of vanilla
1/2 c sour cream
Preheat oven to 285 F (can probably go up to 300 F).
Line two 9-inch springform pans with parchment; butter or spray the parchment and the sides of the pans.
Separate eggs. Beat yolks lightly with a fork and set aside.
Beat whites until stiff, adding sugar when the whites are starting to foam.
Fold in yolks. Fold in the ground walnuts, breadcrumbs, and vanilla.
Pour batter into the two prepared pans, and bake for 30 min.
Filling: mix all ingredients and spread between the torte layers and over the top layer.
My modifications: I like to make two batches of the torte, for a total of 4 layers. Instead of doubling the recipe, I make it in two actual batches, so that the layers bake evenly (while I've done my best to make sure my oven is level, the rack inside appears to slope a bit at the periphery). I add the sugar at a different point in the recipe (as explained further down).
I've also developed my own Chocolate-Praline filling and topping to use with this torte; I like the multiple nut flavors that play together in this combination.
Chocolate-Praline Filling:
11 oz. praline paste (one can of the Love-n-Bake brand)
8 1/4 oz. bittersweet chocolate, chopped
3 c. heavy cream, divided
Place praline paste in a large glass bowl, along with the chopped chocolate. Microwave in 30 sec. increments, stirring until smooth. Let cool while making the whipped cream.
Beat 2 cups of the heavy cream to stiff peaks. Fold into praline paste-chocolate mixture.
Divide into quarters. Spread appr. 1/4 between each of the 4 torte layers. Set aside remaining 1/4.
Beat remaining 1 cup of heavy cream to stiff peaks. Fold into remaining 1/4 of the filling mixture. Spread over top and sides of torte. Chill.
For printable recipe, click here.
I'm going to walk you through the recipe (using my filling) with photos now.
Note that I usually spread out the process of making this torte over 2 or 3 days - it breaks up the work, allows everything to cool and set, and the torte tastes better if it's allowed to sit for a day in the refrigerator before serving. But it'll still be good if you have only a day to make it.
Preheat the oven to 285 F.
Spray the bottom of two 9" springform pans (I use regular Pam spray; you can use special baking sprays too). Put a 9" parchment circle on the bottom of each (or cut parchment to fit), and then spray the parchment and the sides of the pan.
(Buying parchment rounds is a step-saver. I buy mine at the King Arthur Flour website:
http://www.kingarthurflour.com/shop/items/round-parchment-paper#8550#85509INCH
Don't skip the parchment - it keeps baked goods from burning on the bottom, makes it easier to remove the baked good without tearing, and gives you a better end result (I always use it for baking cookies too).
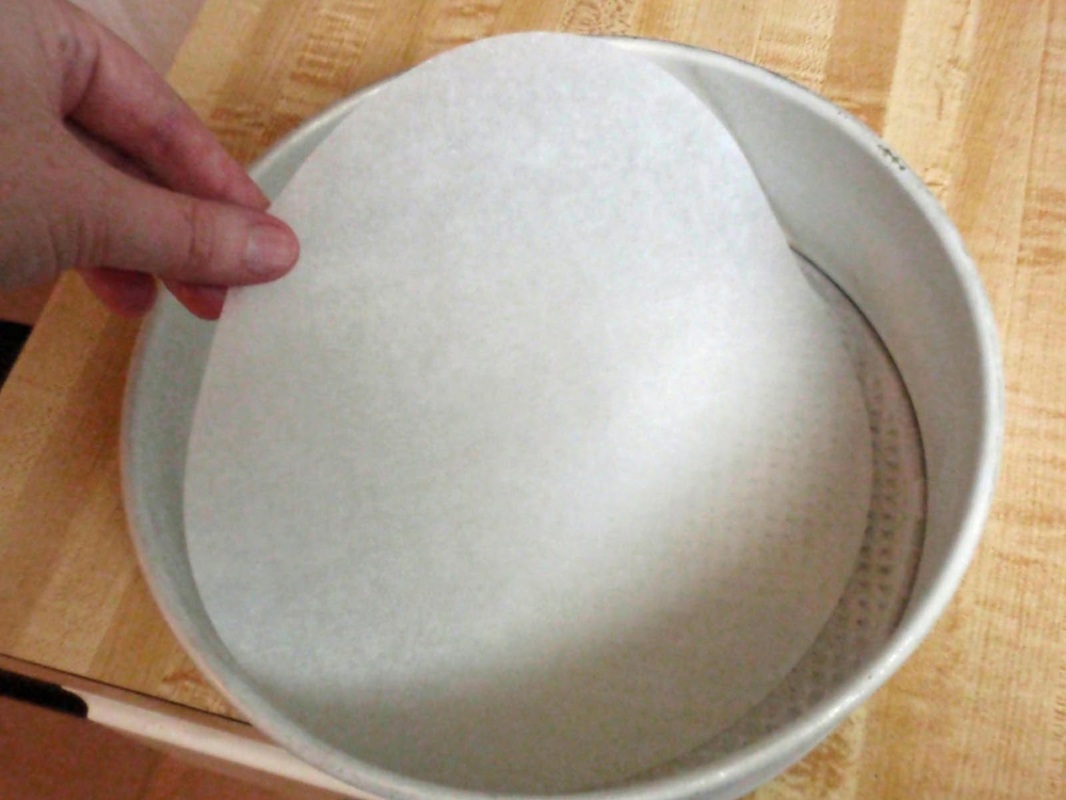
Putting a 9-inch parchment round into my springform pan - don't skip this step!
Separate your 4 eggs into whites and yolks.
Since we'll be whipping the whites into a meringue, it's important that not a speck of yolk gets into the whites (and no, cleaning out the yolk really well just won't do the trick - your whites won't whip up well). So I use three bowls. Let the white drip into the first bowl, drop the intact yolk into the second bowl, then pour the white into the third bowl; then start again with the first bowl. This way, if your yolk breaks on your third egg, you've only ruined one egg instead of three - just save that egg for an omelet or something, get a clean bowl and another egg, and start again.
Since we'll be whipping the whites into a meringue, it's important that not a speck of yolk gets into the whites (and no, cleaning out the yolk really well just won't do the trick - your whites won't whip up well). So I use three bowls. Let the white drip into the first bowl, drop the intact yolk into the second bowl, then pour the white into the third bowl; then start again with the first bowl. This way, if your yolk breaks on your third egg, you've only ruined one egg instead of three - just save that egg for an omelet or something, get a clean bowl and another egg, and start again.
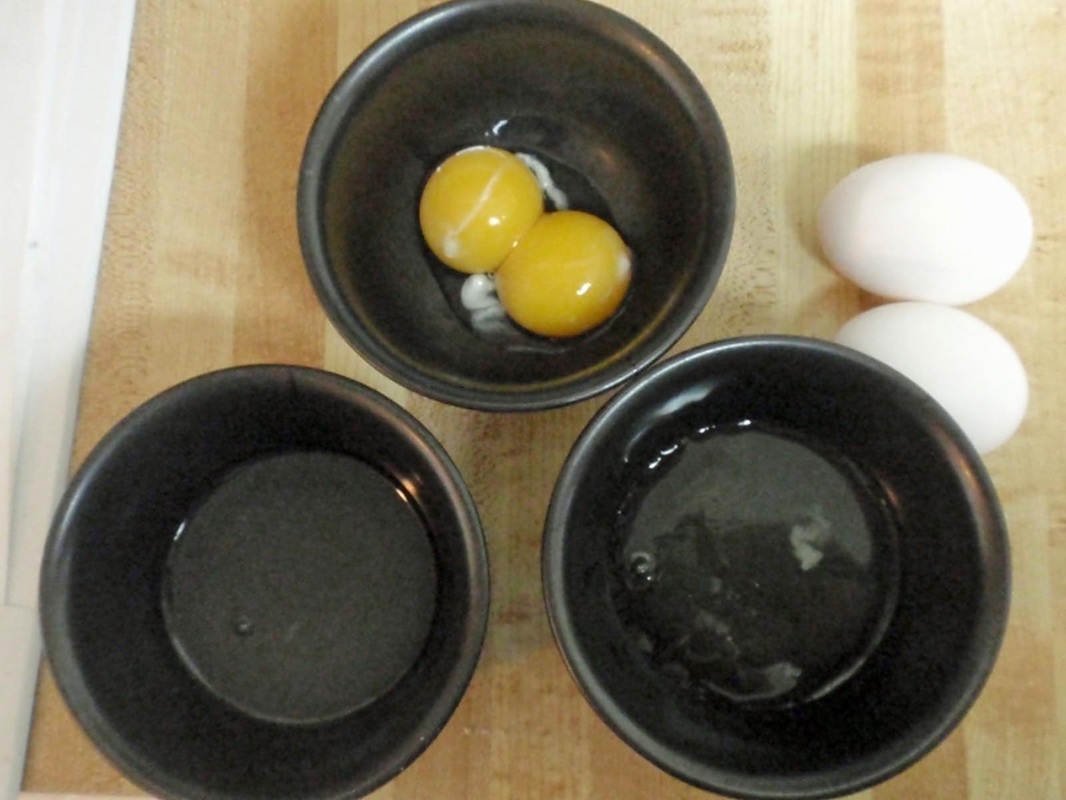
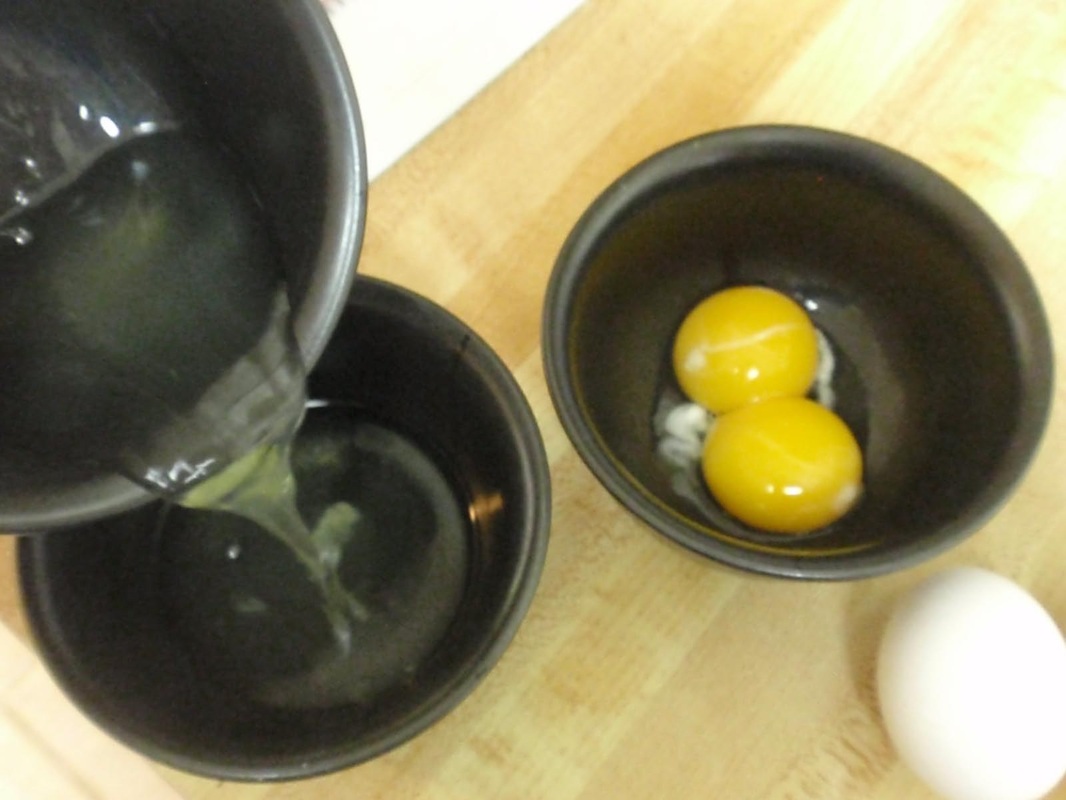
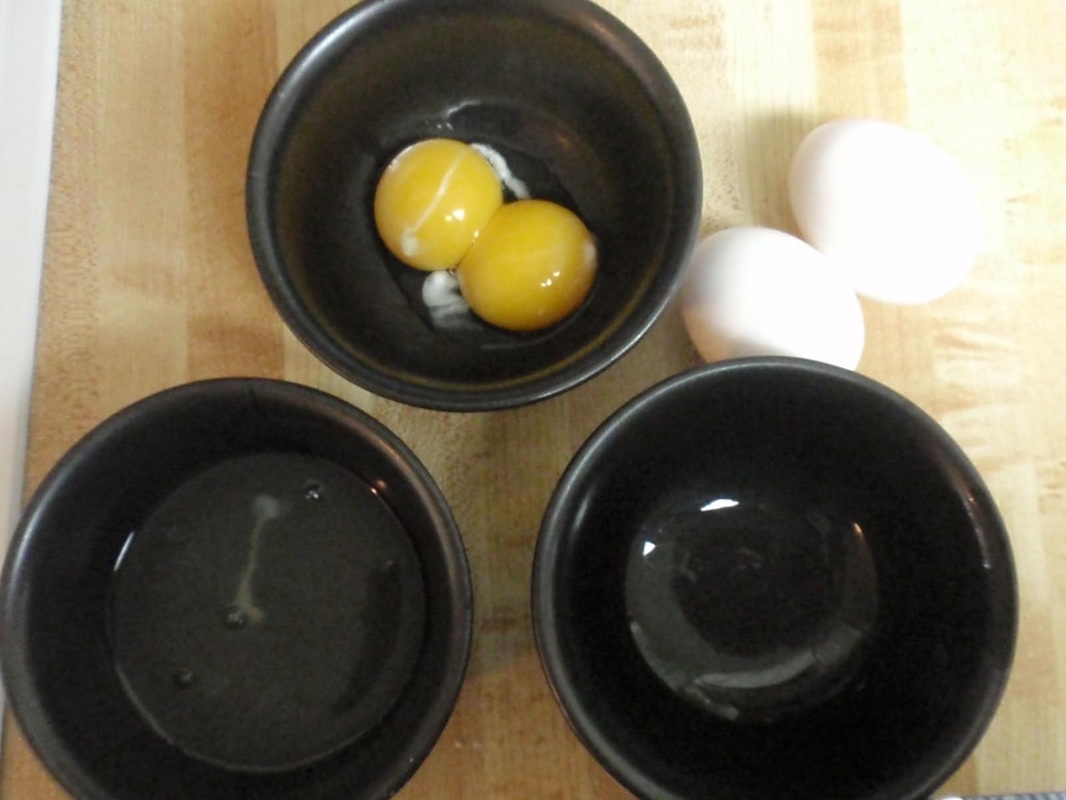
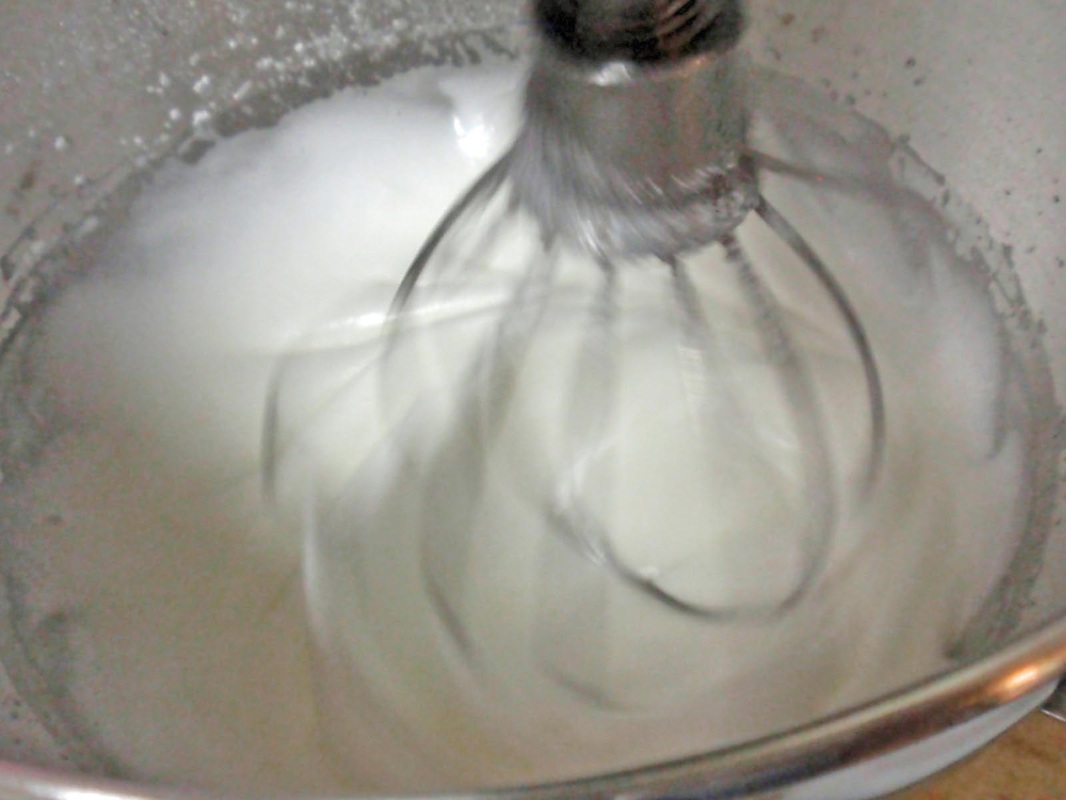
Break up the yolks with a fork, and stir until fairly smooth. Set aside.
Note: I've received a suggestion that the yolks could be beaten until light in color at this point, to lighten the texture of the torte layers. I plan to try that next time I make this recipe.
Note: I've received a suggestion that the yolks could be beaten until light in color at this point, to lighten the texture of the torte layers. I plan to try that next time I make this recipe.
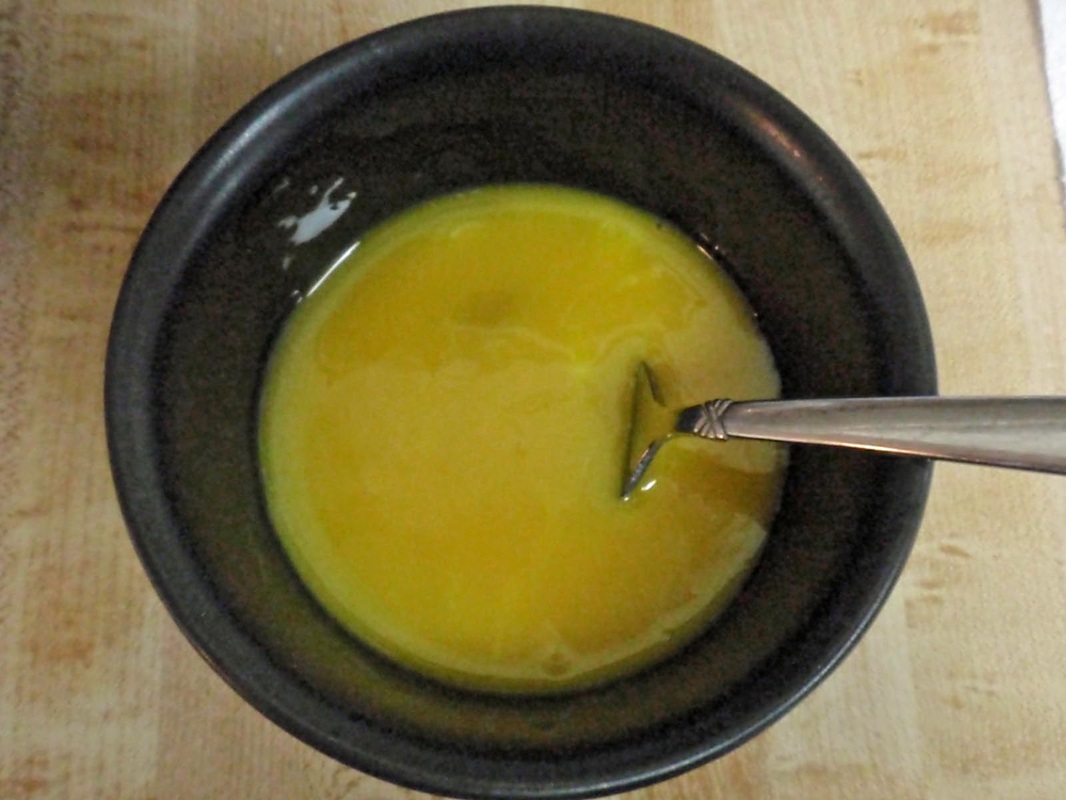
Egg yolks, beaten lightly with a fork.
It's a good idea to get your other ingredients measured out at this point, so that you have them ready to go later on.
You'll notice that the original recipe here provides measurements by weight, instead of by volume - this is the norm in many parts of the world, and it is widely considered to be more precise. I've provided rough equivalencies by volume, for those who do not have a kitchen scale, but purchasing a kitchen scale is not a bad investment if you're going to be cooking and baking a lot, even if it's just at holiday time. My own scale is a Salter, purchased at King Arthur Flour (my favorite online resource, both for shopping and for recipes and baking advice). They no longer carry that particular brand, but they have others: http://search.kingarthurflour.com/search?p=Q&asug=&af=type%3Aproducts&w=scale
You'll notice that the original recipe here provides measurements by weight, instead of by volume - this is the norm in many parts of the world, and it is widely considered to be more precise. I've provided rough equivalencies by volume, for those who do not have a kitchen scale, but purchasing a kitchen scale is not a bad investment if you're going to be cooking and baking a lot, even if it's just at holiday time. My own scale is a Salter, purchased at King Arthur Flour (my favorite online resource, both for shopping and for recipes and baking advice). They no longer carry that particular brand, but they have others: http://search.kingarthurflour.com/search?p=Q&asug=&af=type%3Aproducts&w=scale
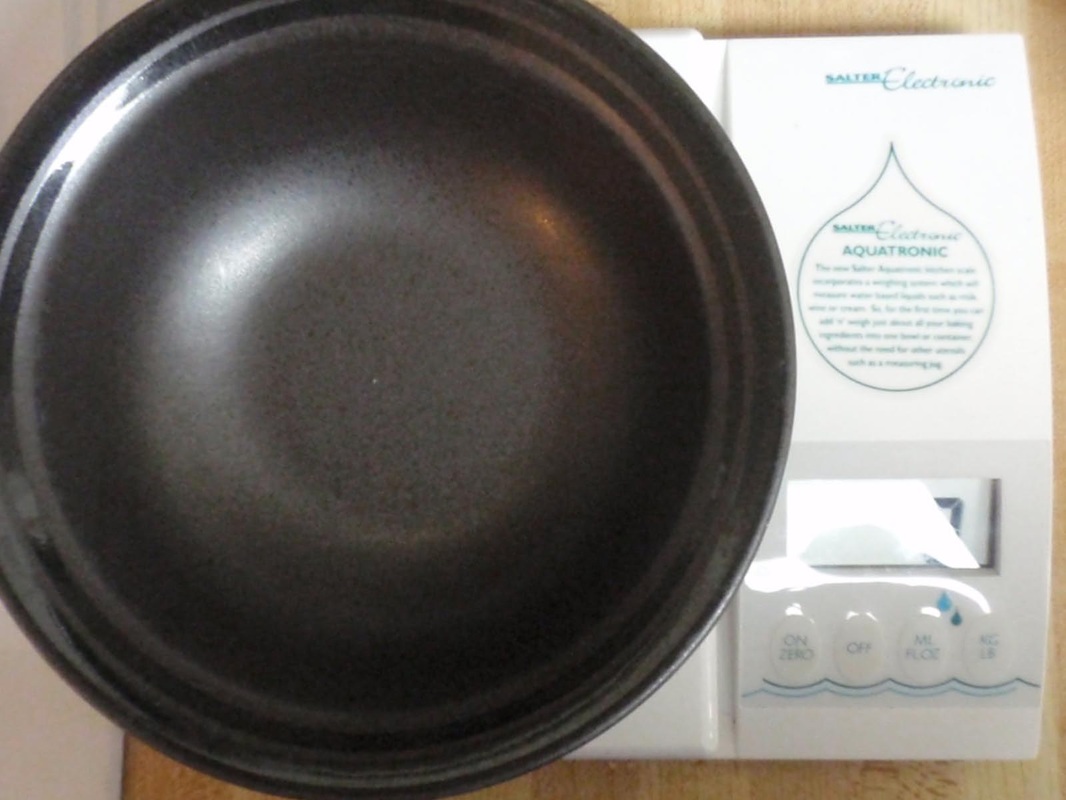
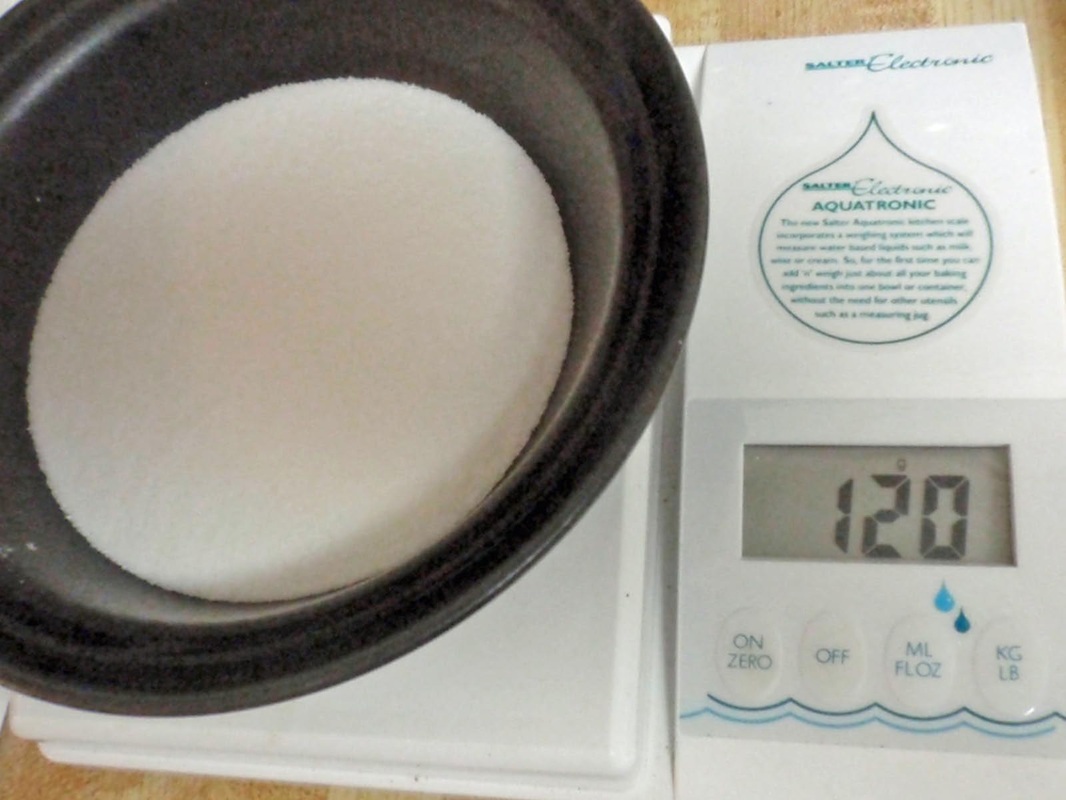
To use a kitchen scale, you need to "zero it out" first. Put the empty bowl onto the scale and then turn the scale on - that way you're not including the bowl's weight with the sugar's weight.
My scale switches easily from ounces to grams. The original recipe says 12 dekagrams, which is 120 grams (if your scale only measures ounces, it's about 4.2 oz here). Add sugar to the bowl until the display reads 120 grams.
Set the bowl aside.
My scale switches easily from ounces to grams. The original recipe says 12 dekagrams, which is 120 grams (if your scale only measures ounces, it's about 4.2 oz here). Add sugar to the bowl until the display reads 120 grams.
Set the bowl aside.
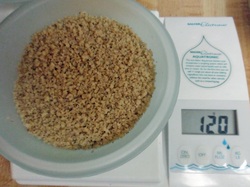
Grind up your walnuts in a food processor, and then measure them on your scale the same way - 120 grams.
(Remember to repeat the zeroing out process!)
Set that bowl aside too.
(Remember to repeat the zeroing out process!)
Set that bowl aside too.
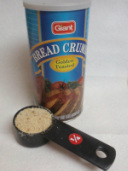
Measure out your breadcrumbs now - 1/4 cup. Use plain, unseasoned breadcrumbs. Set aside.
Breadcrumbs frequently appear as an ingredient in Eastern European tortes. I'm not sure if this is because of lack of access to flour in wartime, or for another reason.
Breadcrumbs frequently appear as an ingredient in Eastern European tortes. I'm not sure if this is because of lack of access to flour in wartime, or for another reason.
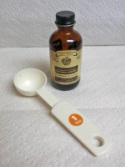
You can get your vanilla ready to measure out too now - 1 Tbsp. - but I wouldn't actually pour it yet.
Good quality vanilla extract is a worthwhile investment - it really adds depth of flavor to anything you're baking.
I like Nielsen-Massey's Madagascar Bourbon Vanilla, and I purchase it (of course!) at King Arthur Flour:
http://www.kingarthurflour.com/shop/items/madagascar-bourbon-vanilla-extract#1258#1258
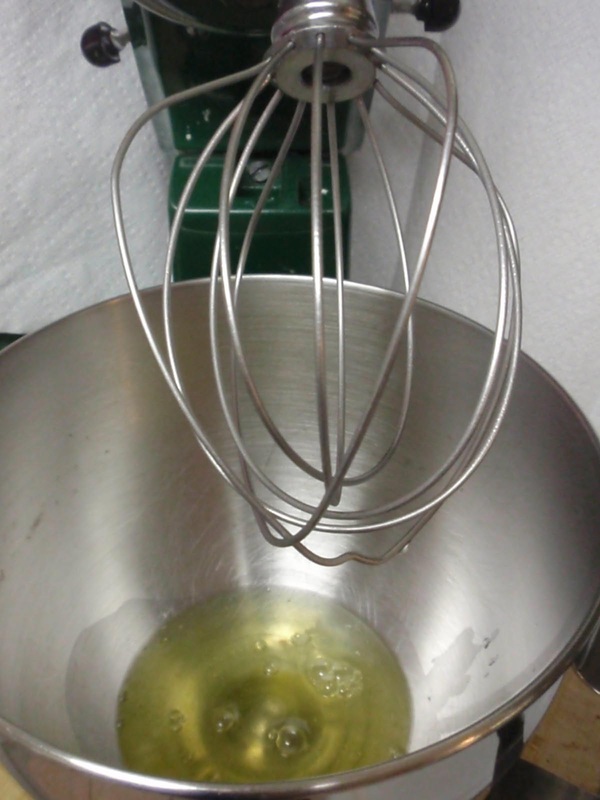
Now we'll get back to those egg whites!
Transfer the egg whites to a mixing bowl. Put a whisk attachment on your mixer. Beat the whites at medium-high speed for about 1 1/2 minutes - the whites will be frothy, getting whiter, thicker, and increased in volume.
Transfer the egg whites to a mixing bowl. Put a whisk attachment on your mixer. Beat the whites at medium-high speed for about 1 1/2 minutes - the whites will be frothy, getting whiter, thicker, and increased in volume.
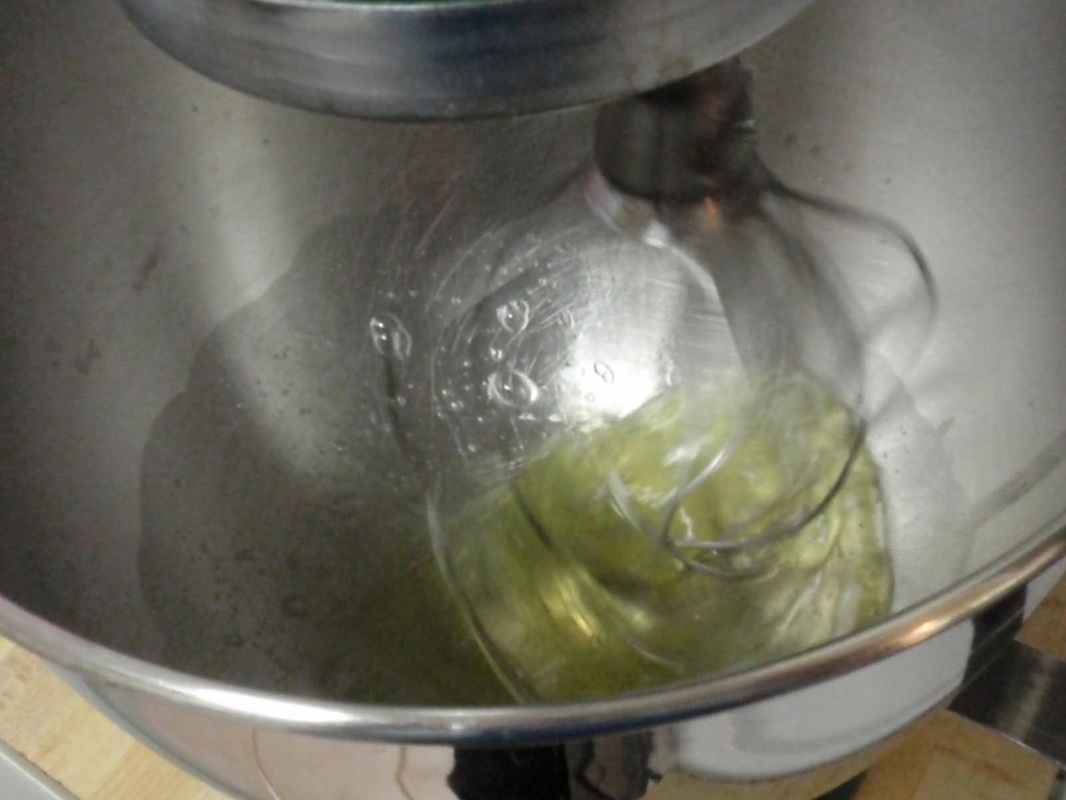
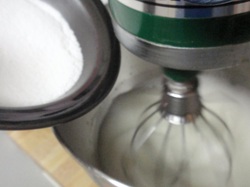
Add the sugar now.
Cook's Illustrated explains that this is the optimal point in the process to add sugar to egg whites, to avoid graininess. This is why I no longer add the sugar to the yolks, as in our original recipe.
http://www.cooksillustrated.com/
recipes/article.asp?docid=12432
Cook's Illustrated explains that this is the optimal point in the process to add sugar to egg whites, to avoid graininess. This is why I no longer add the sugar to the yolks, as in our original recipe.
http://www.cooksillustrated.com/
recipes/article.asp?docid=12432
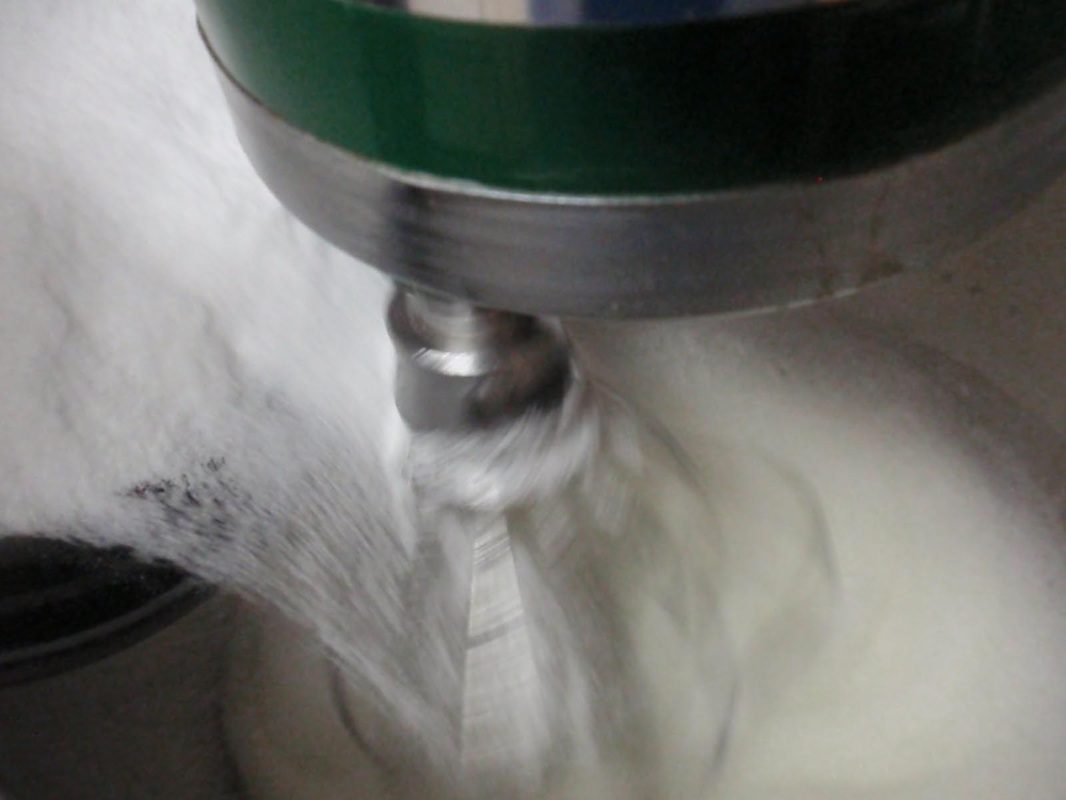


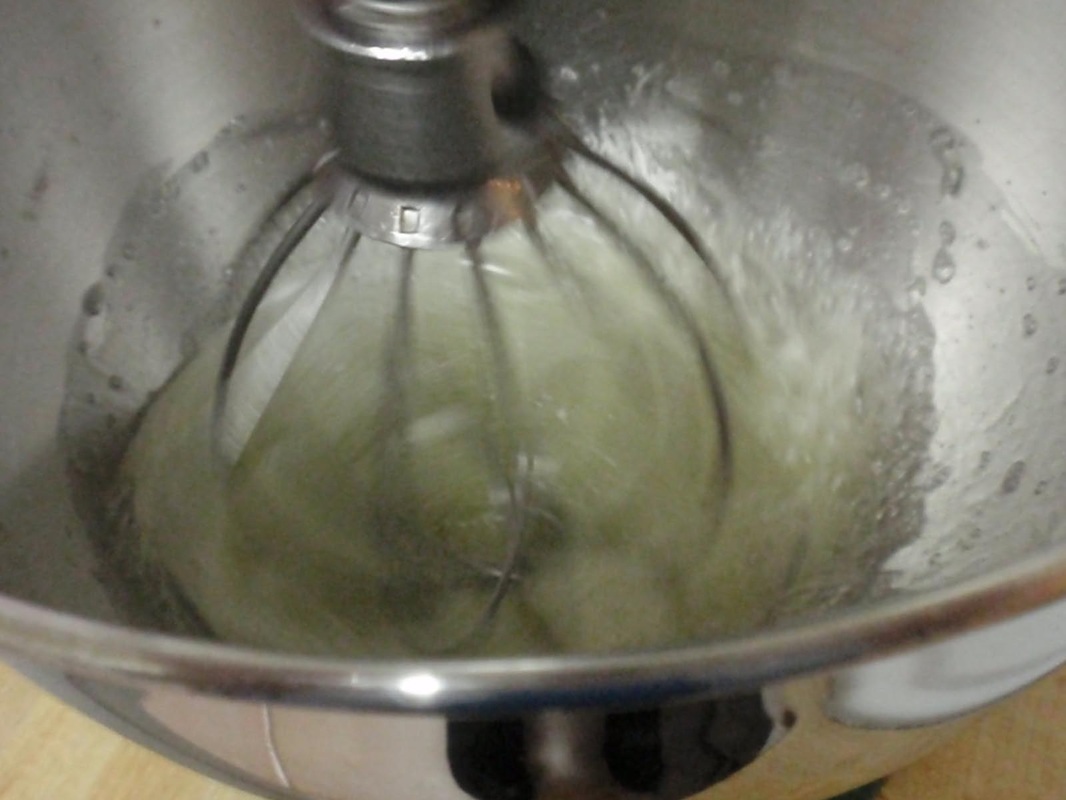
Pour the sugar in a steady stream, continuing to beat. Keep whipping. You'll see the egg whites getting whiter, glossier, and thicker. In the third photo above, you see that they're still a bit drippy. But in the fourth picture, you can see that the egg whites can stand up a bit on their own, before flopping over - this is called "soft peak stage". We don't need to go all the way to "stiff peak stage" because we're not making meringue cookies - we'll be folding in the other ingredients for the torte, and that actually works better at soft peak than at stiff peak. I got to soft peak at about 3 1/2 minutes.
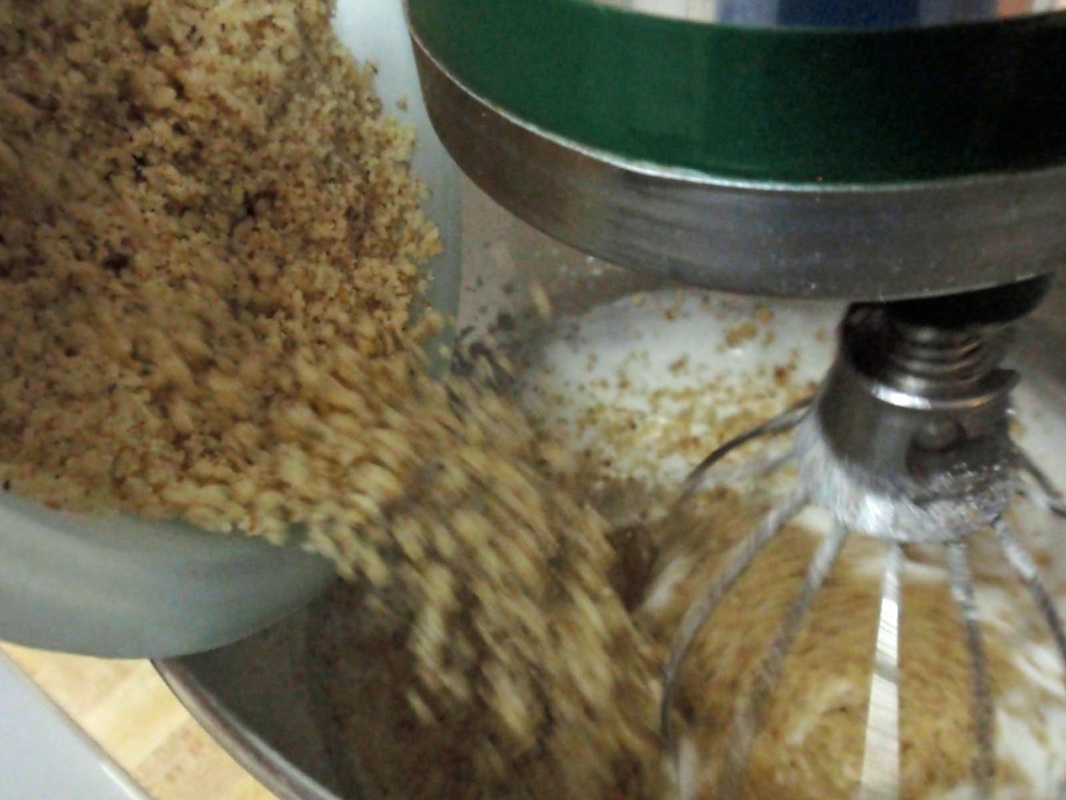
Now you can add those bowls of egg yolks, ground walnuts, and breadcrumbs, as well as the vanilla extract.
Either fold in by hand, or just use the very lowest speed on your mixer. You don't want to mix too much, so that you don't lose too much volume from the air that you just whipped into the egg whites - that's why we say "fold" instead of "mix".


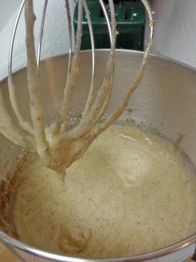
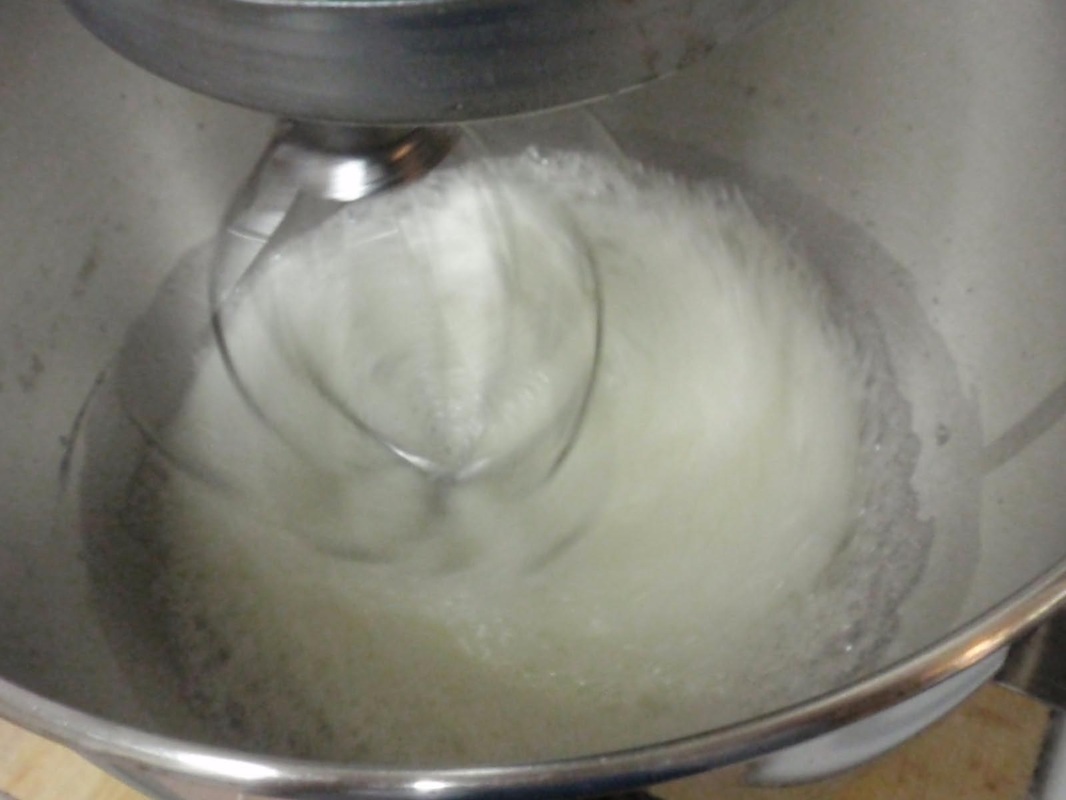
Because we folded instead of mixed, we still have a good amount of volume left in the batter, from the air whipped into the egg whites. This will help the completed torte from tasting too heavy and dense.
Now you can go ahead and pour the batter into your two prepared pans. You'll need to tilt the pans a bit to get the batter evenly distributed.
Try to get even amounts of batter in the two pans. No biggie if they're not exactly even, but you want the layers to come out fairly similar.
Now you can go ahead and pour the batter into your two prepared pans. You'll need to tilt the pans a bit to get the batter evenly distributed.
Try to get even amounts of batter in the two pans. No biggie if they're not exactly even, but you want the layers to come out fairly similar.
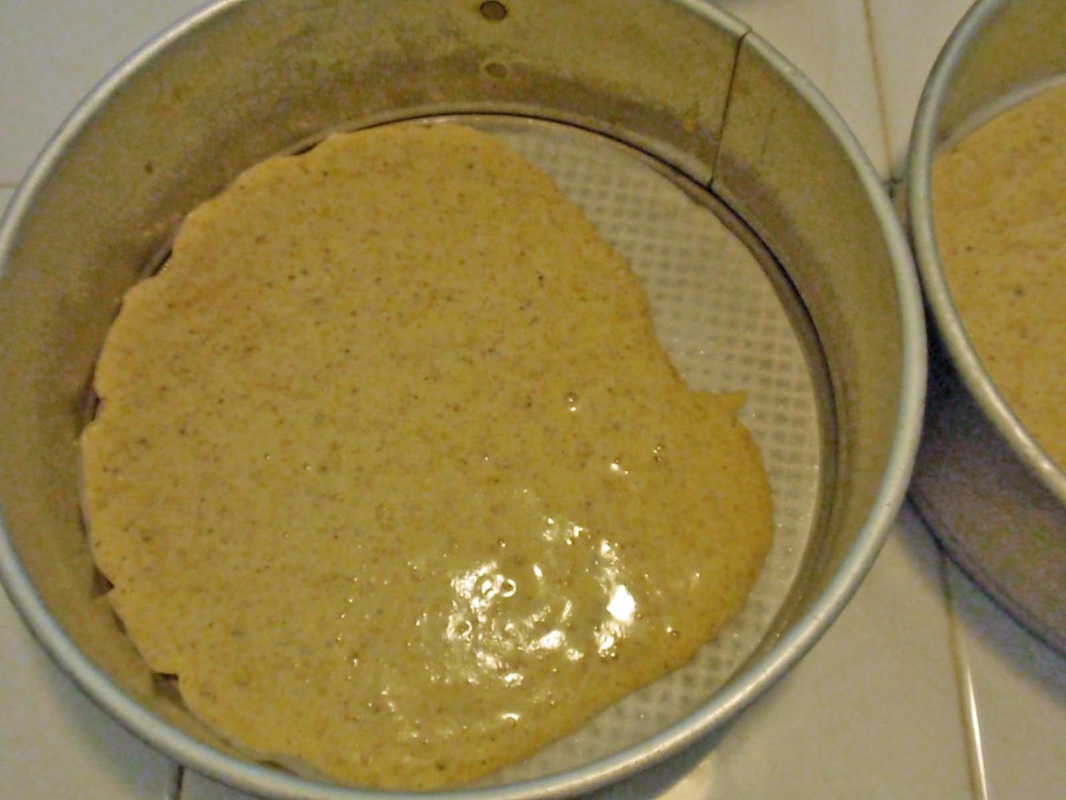
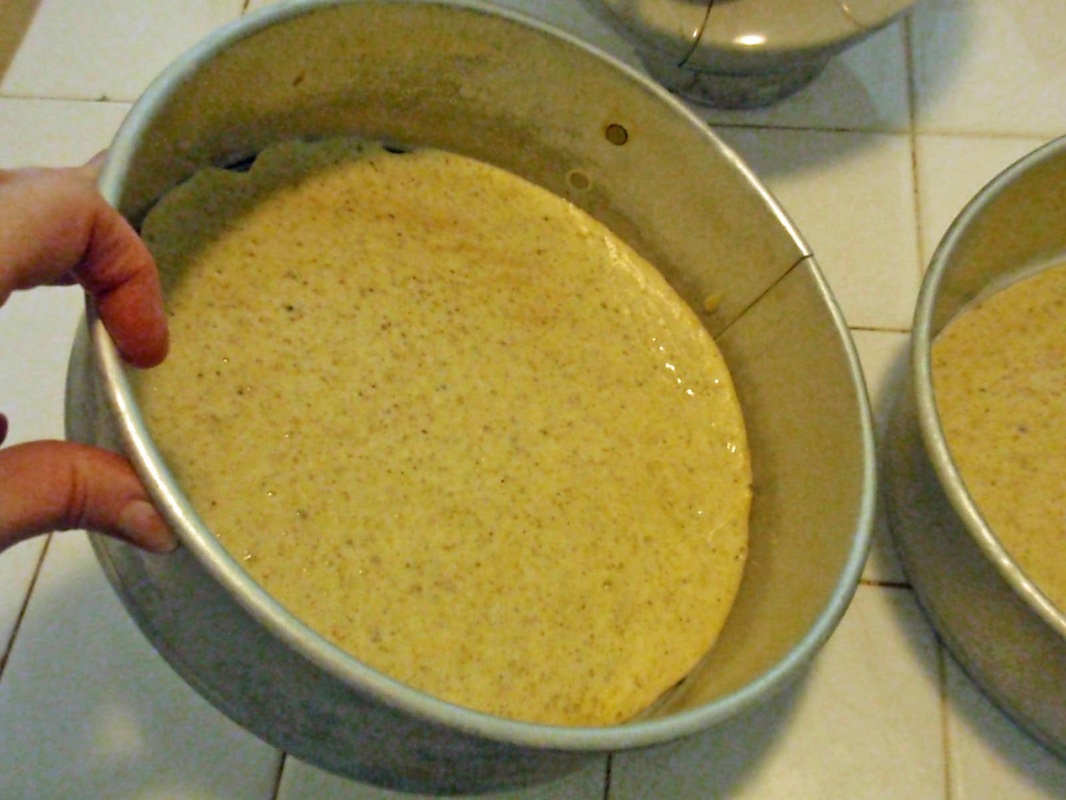
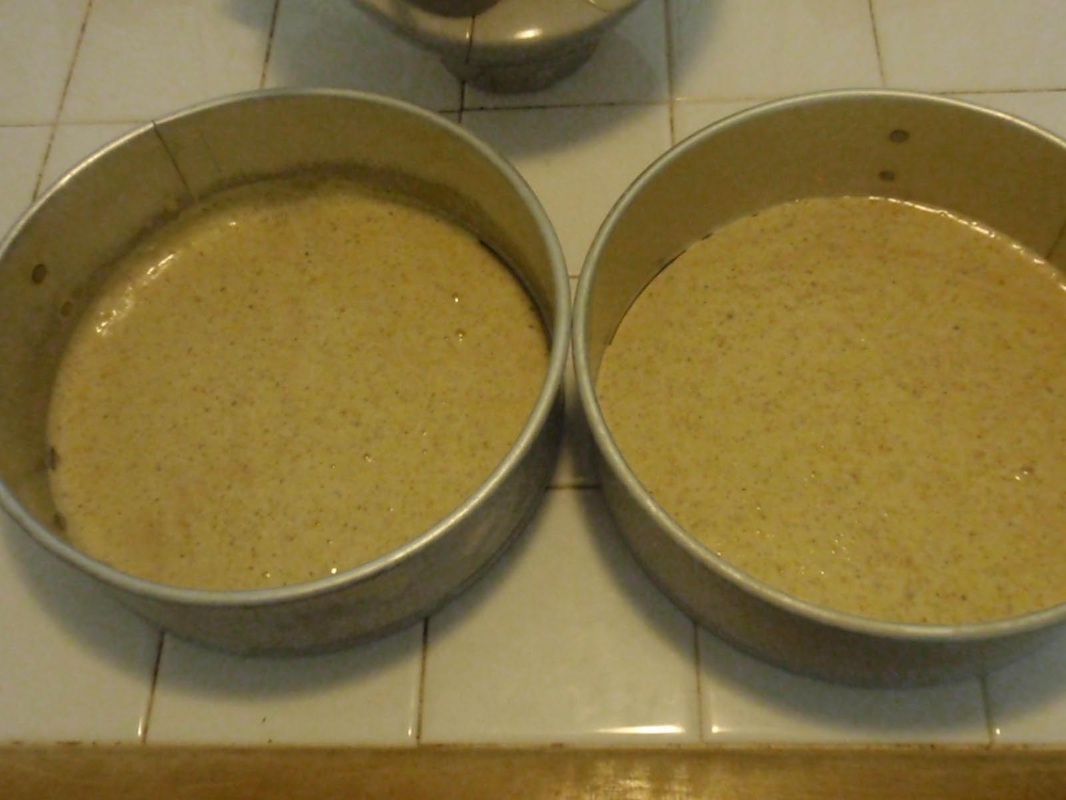
Bake at 285 F (you can go as high as 300 F if you like) for 30 minutes.
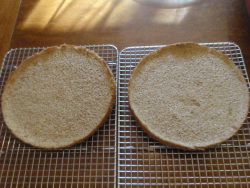
Remove from the oven to cool on racks.
Here are my two baked layers - I've removed the collars of the springform pans. You can remove the bases too - the parchment rounds will keep the torte layers intact.
Did you want a 4-layer torte? Repeat the process for 2 more layers now!
Remove from the oven to cool on racks.
Here are my two baked layers - I've removed the collars of the springform pans. You can remove the bases too - the parchment rounds will keep the torte layers intact.
Did you want a 4-layer torte? Repeat the process for 2 more layers now!
FILLING
Ready to move on to the filling? I usually wait until the next day, just to break up the work. But you'll be able to fill the torte as soon as the layers are cool. If you're waiting until the next day, cover the layers with plastic wrap so that they don't dry out. The parchment rounds on the bottom will protect the undersides of the layers too.
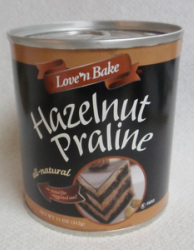
For the Chocolate Praline filling, you need some praline paste. I really like this Love'n Bake brand, which comes in an 11 oz. size (and I've modified my recipe so that I use up the whole can).
I buy this online at - you guessed it! - King Arthur Flour:
http://www.kingarthurflour.com/shop/items/all-natural-hazelnut-praline-paste-11-oz
Chop up your bittersweet chocolate, or use chocolate disks or wafers (King Arthur has a good selection). I'm using a combination of two different brands/shapes in the pictures below - I think it adds a bit of complexity of flavor.
Put the chocolate and the praline paste in a microwaveable glass bowl (I should have used a larger one here). Microwave in 30 second increments, stirring each time.
Ready to move on to the filling? I usually wait until the next day, just to break up the work. But you'll be able to fill the torte as soon as the layers are cool. If you're waiting until the next day, cover the layers with plastic wrap so that they don't dry out. The parchment rounds on the bottom will protect the undersides of the layers too.
For the Chocolate Praline filling, you need some praline paste. I really like this Love'n Bake brand, which comes in an 11 oz. size (and I've modified my recipe so that I use up the whole can).
I buy this online at - you guessed it! - King Arthur Flour:
http://www.kingarthurflour.com/shop/items/all-natural-hazelnut-praline-paste-11-oz
Chop up your bittersweet chocolate, or use chocolate disks or wafers (King Arthur has a good selection). I'm using a combination of two different brands/shapes in the pictures below - I think it adds a bit of complexity of flavor.
Put the chocolate and the praline paste in a microwaveable glass bowl (I should have used a larger one here). Microwave in 30 second increments, stirring each time.
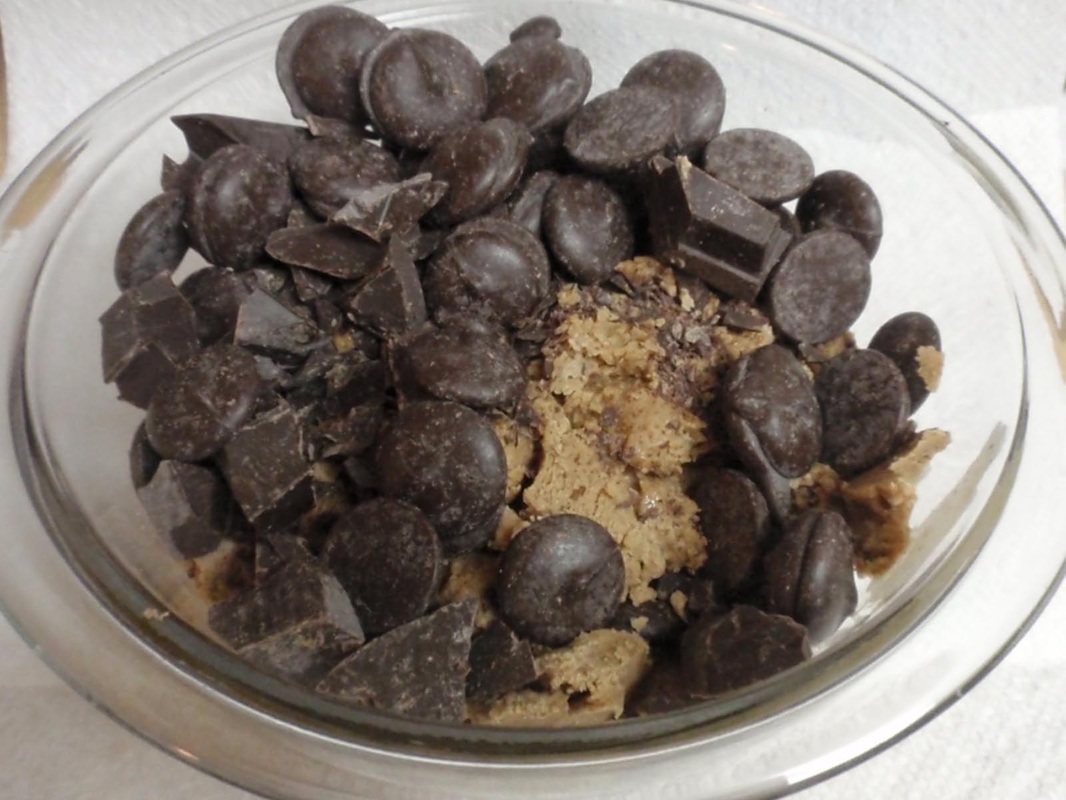
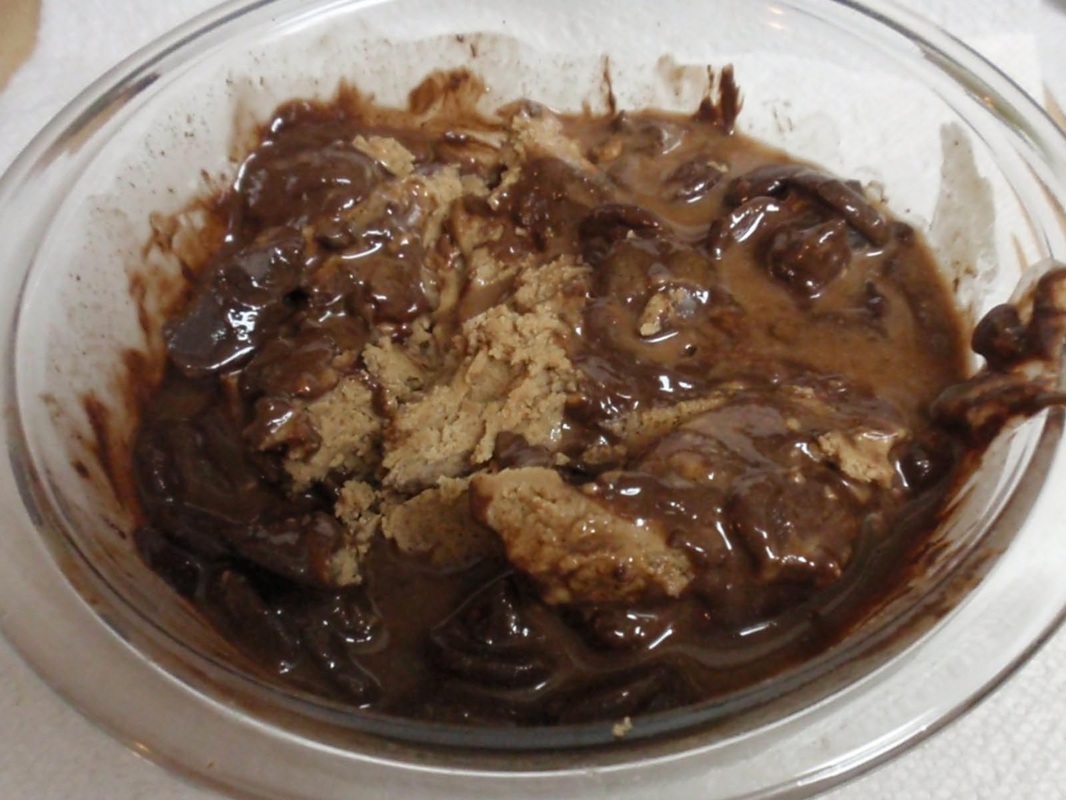
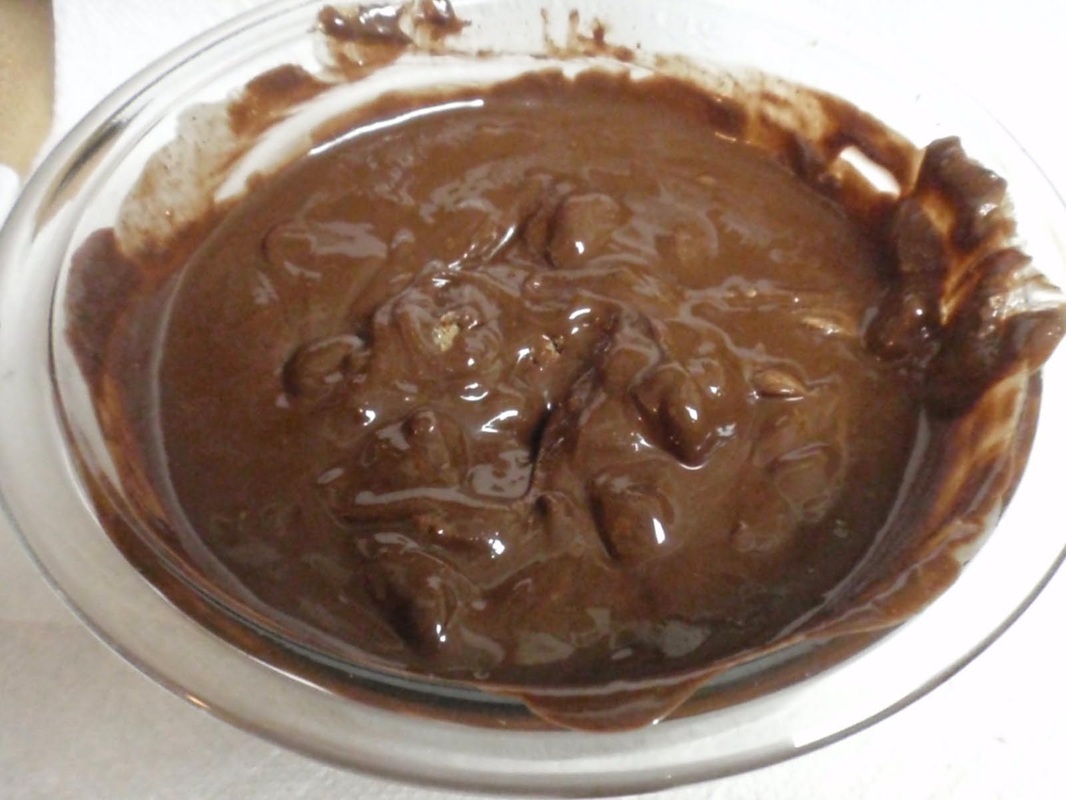
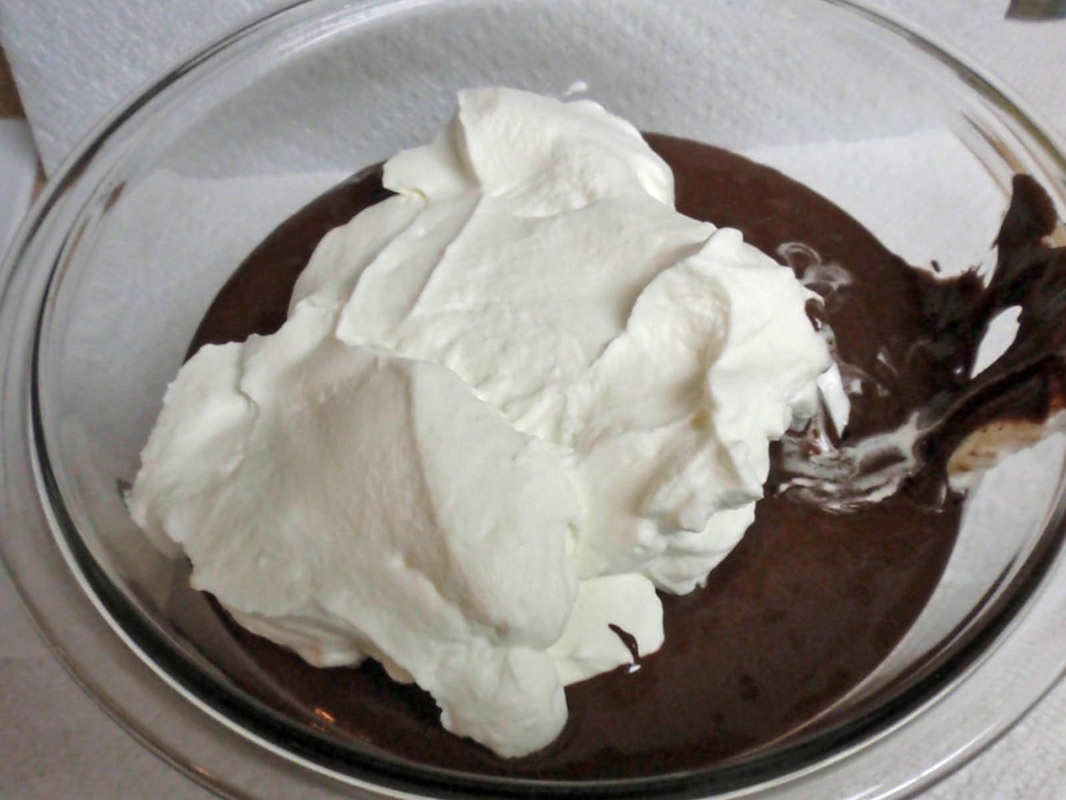
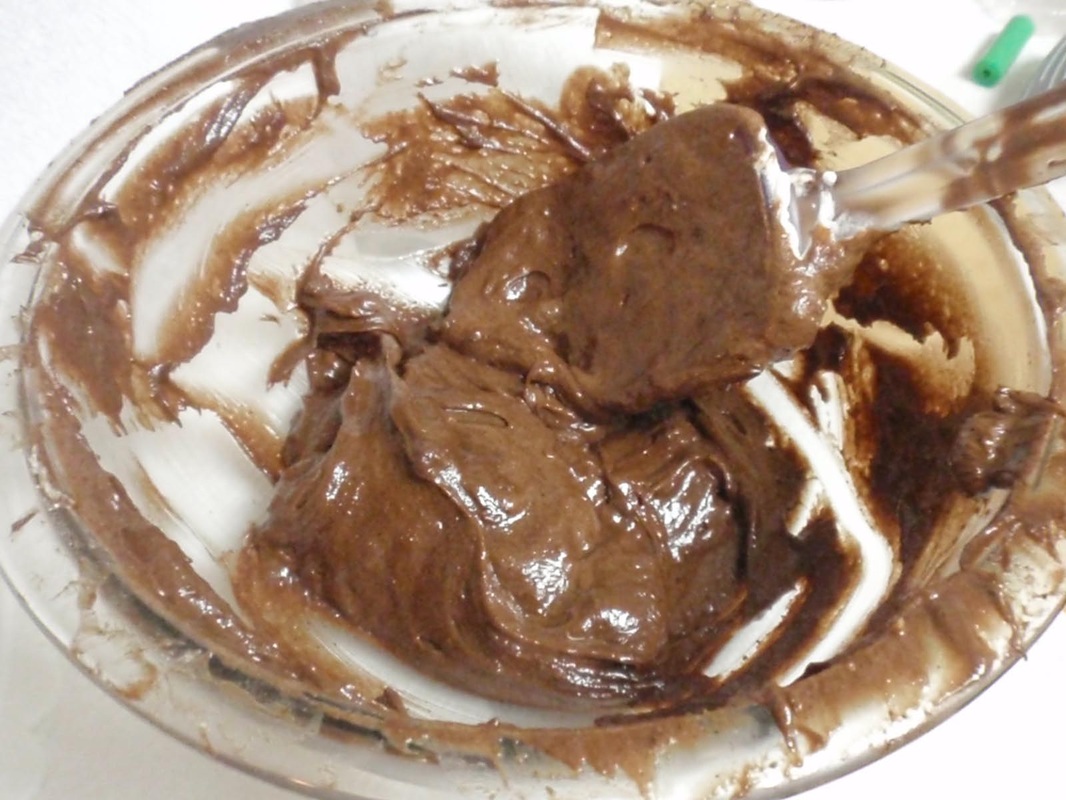
The chocolate will melt much more quickly than the praline paste - see picture 3 above. You'll need to use your spoon to press chunks of the praline paste against the side of the bowl to get to a smooth state, as in picture 4 above. Keep stirring without microwaving any more - you don't want to burn the chocolate.
You can let the mixture cool while you whip the heavy cream.
You can let the mixture cool while you whip the heavy cream.

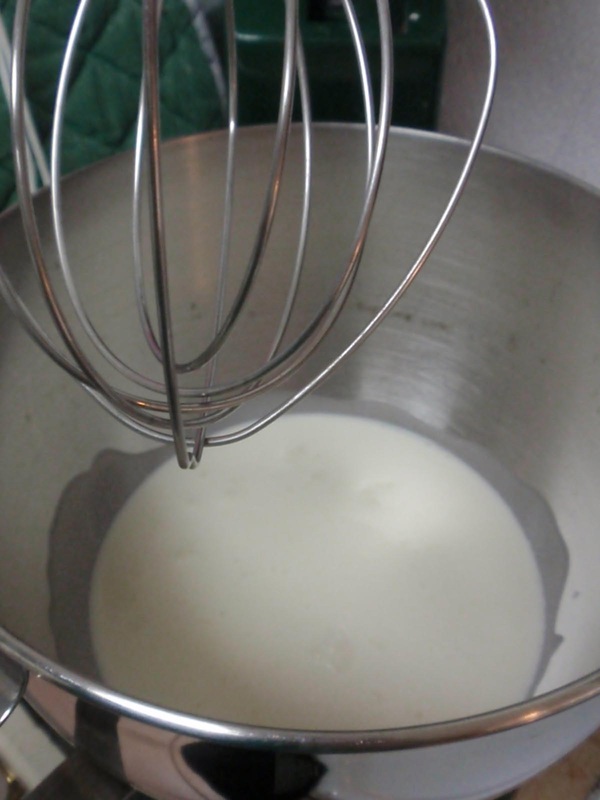
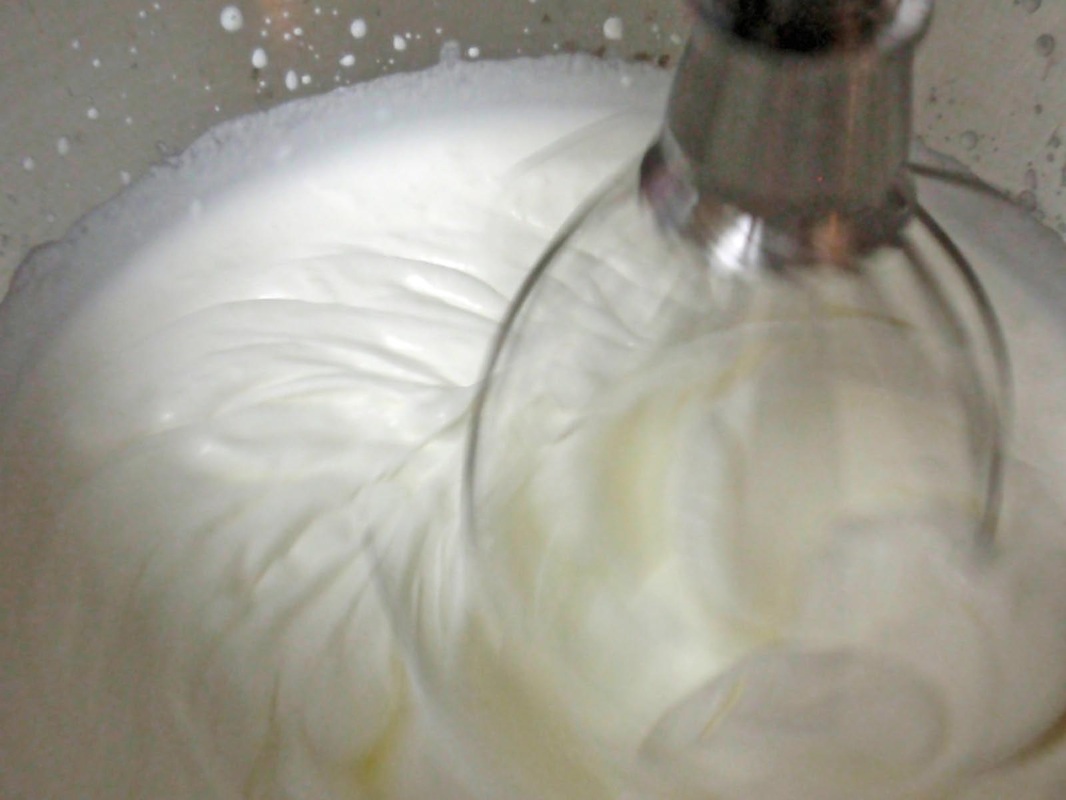
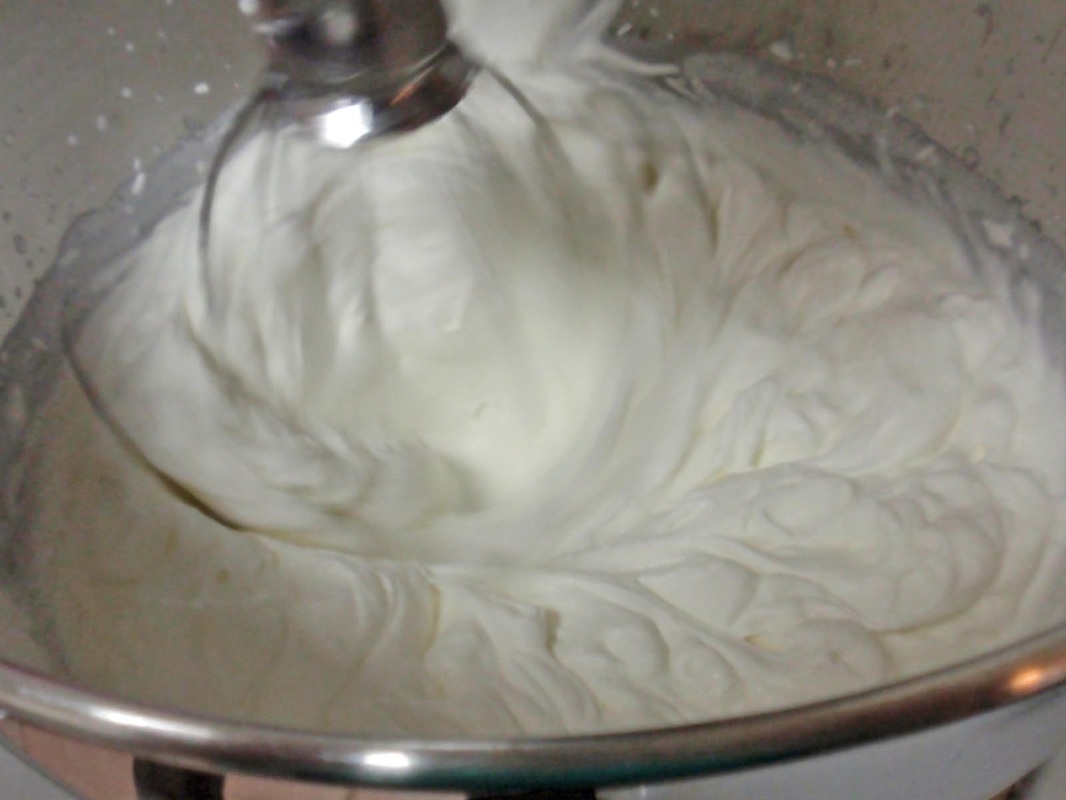
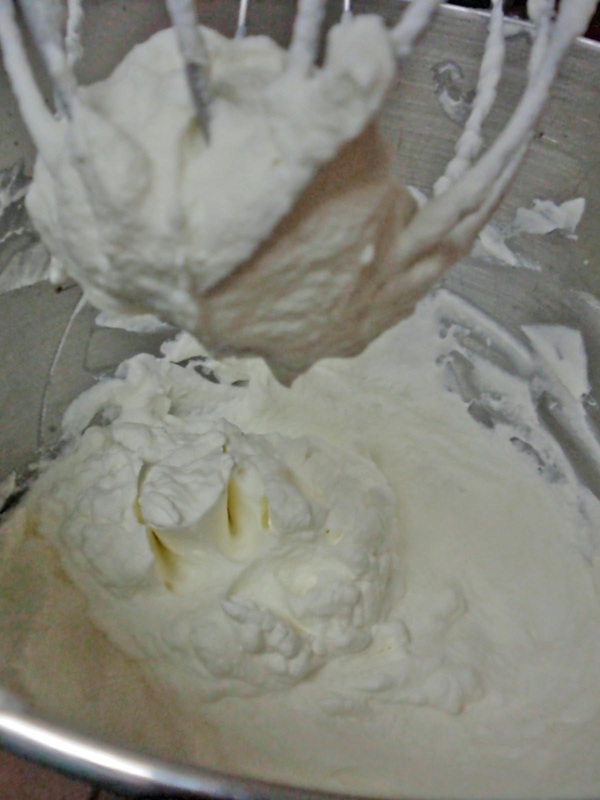
Measure out about 2 cups of the heavy cream (not all 3 cups). It should be cold - temperature is important when you're whipping cream.
Put it in the bowl of your mixer, with a whisk attachment.
(If it's a hot and humid day, you may want to chill your bowl and whisk before starting.)
Start whipping at a medium-high speed (if you're using a KitchenAid mixer, you may want to put on the pouring shield for the beginning so that you don't get splashed).
Knowing how long it takes to get to soft-peak and stiff-peak stage with whipping cream takes practice, so I've put some photos below. Photo 4 is soft-peak, but we want stiff peak here, which we have in Photo 6. It took about 1 min 45 sec in this case, but a lot depends on your mixer speed, temperature, etc.


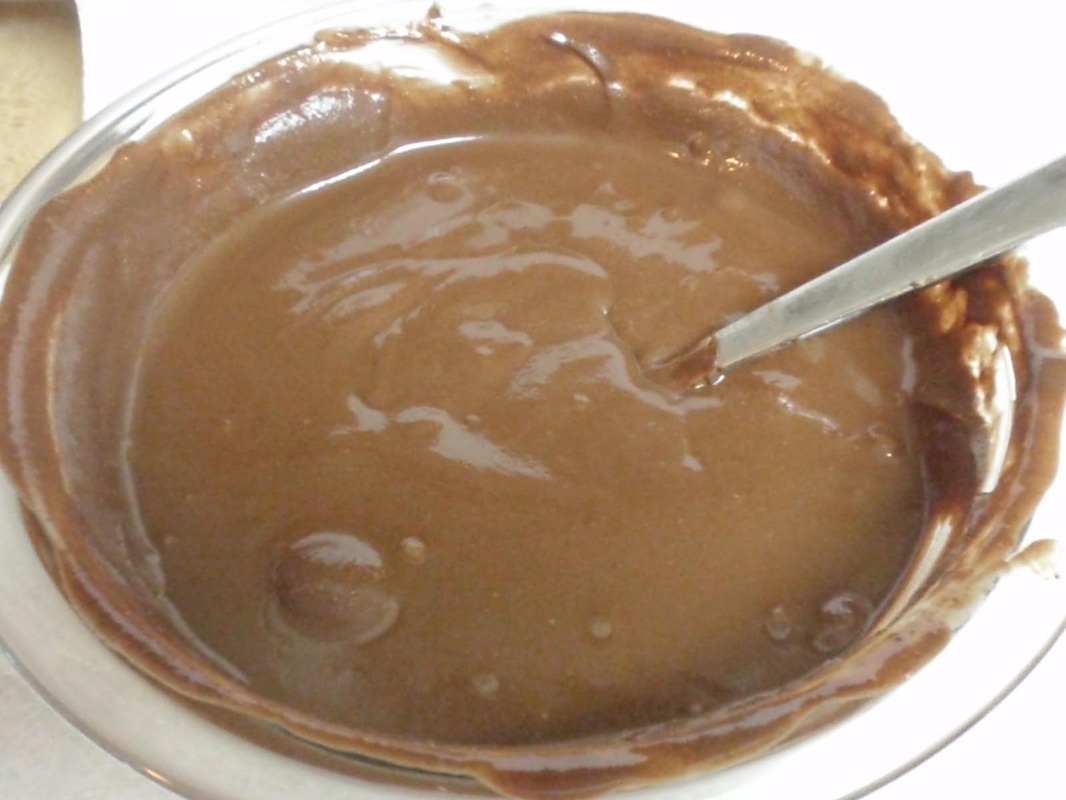
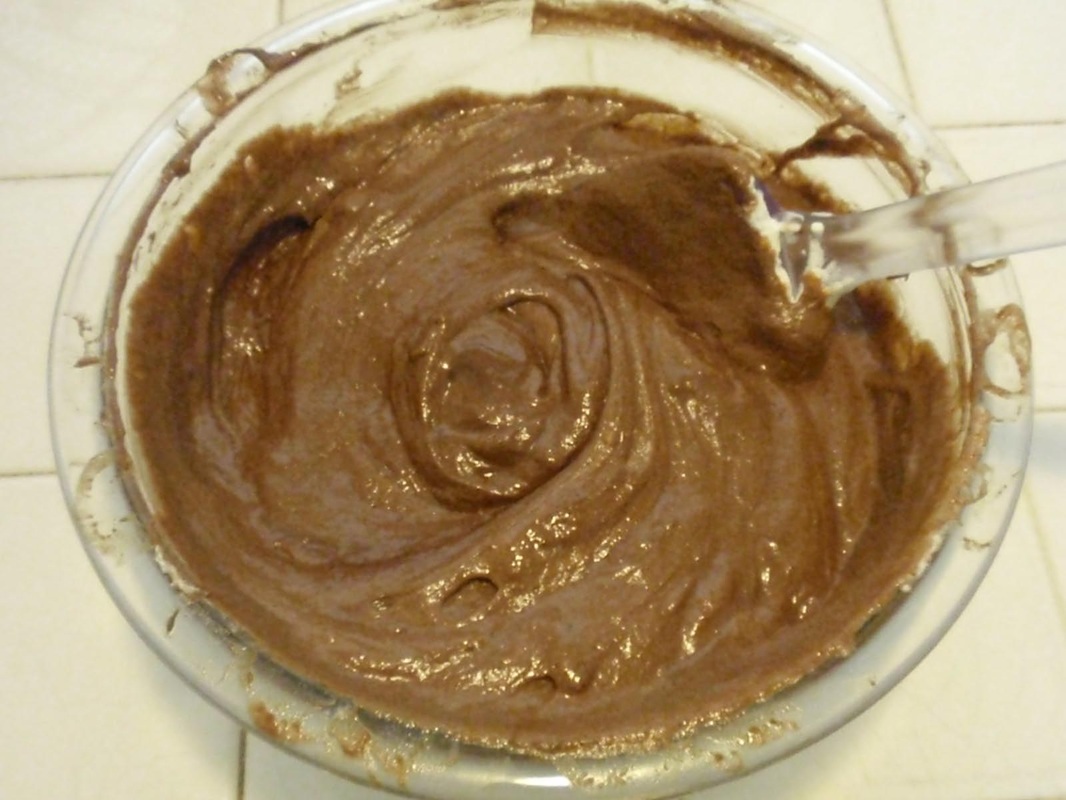
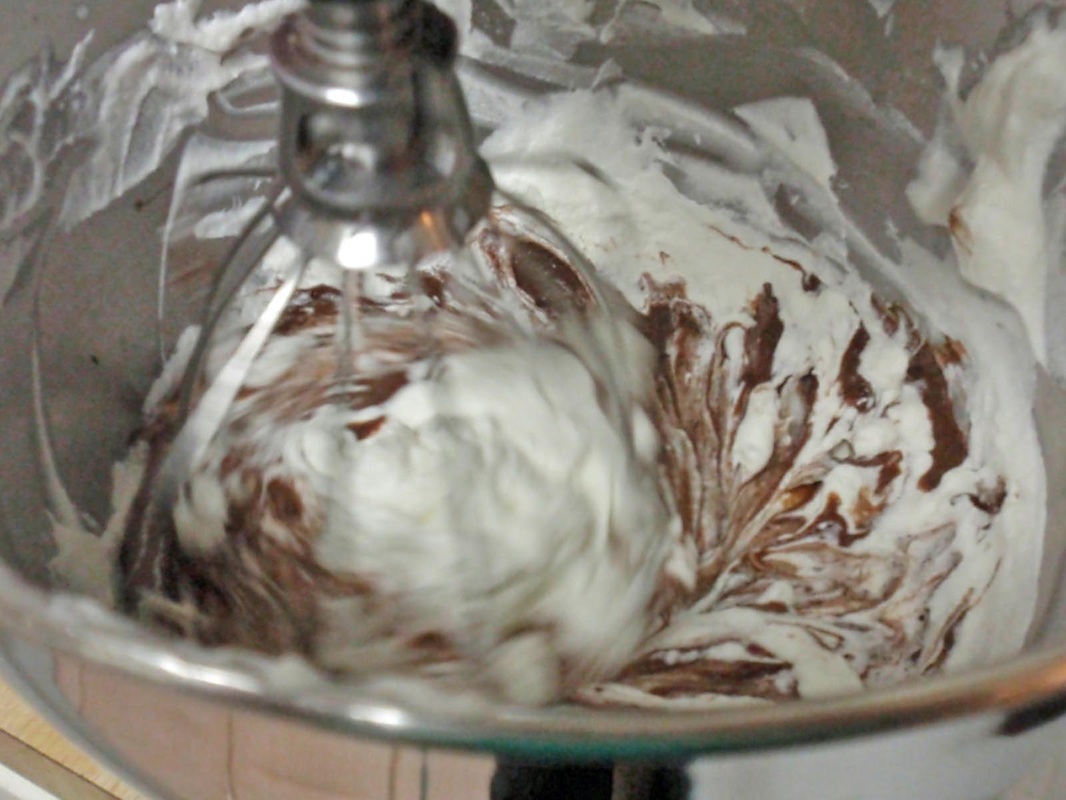
So now you have some lovely whipped cream, and you need to blend it with the chocolate-praline mixture that you made earlier. You don't want to lose the air that you just beat into the cream, so be sure to fold, not mix.
(Cook's Illustrated has nice drawings explaining the technique of folding: http://www.cooksillustrated.com/howto/detail.asp?docid=19803)
(Cook's Illustrated has nice drawings explaining the technique of folding: http://www.cooksillustrated.com/howto/detail.asp?docid=19803)

Now you're ready to start assembling the torte!
I recommend using a little cake decorating turntable here - it makes things easier. If you don't have one, don't worry about it - you'll manage. The one I'm using is an old model, but Wilton.com has a newer model here (you can probably find it in your local Michael's, JoAnn's, or other craft store):
http://www.wilton.com/store/site/product.cfm?id=93495B56-423B-522D-FDFBD34DCAFFB07C&killnav=1
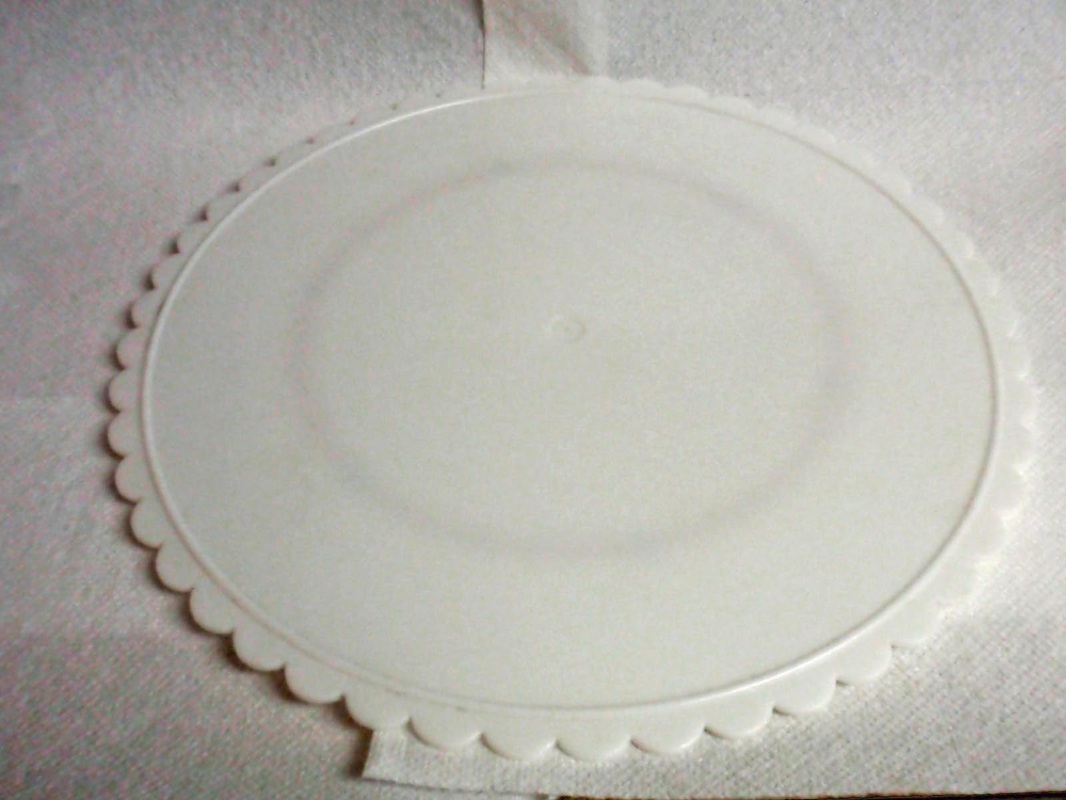
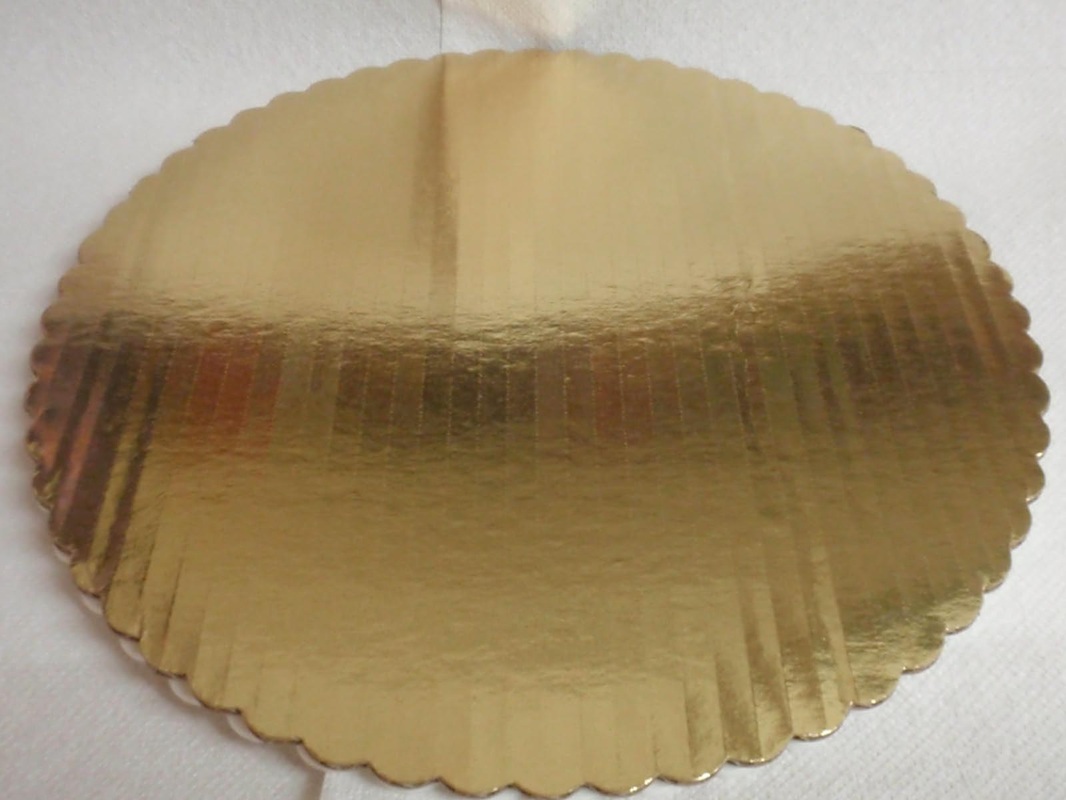
Put your cake plate or cake board on the turntable. I'm using a cardboard cake board here because this is a pre-ordered torte and I don't want to have to make arrangements to retrieve a cake plate from the customer.
I bought this cake board at my local cake supply store, but Wilton now sells a number of different kinds too.
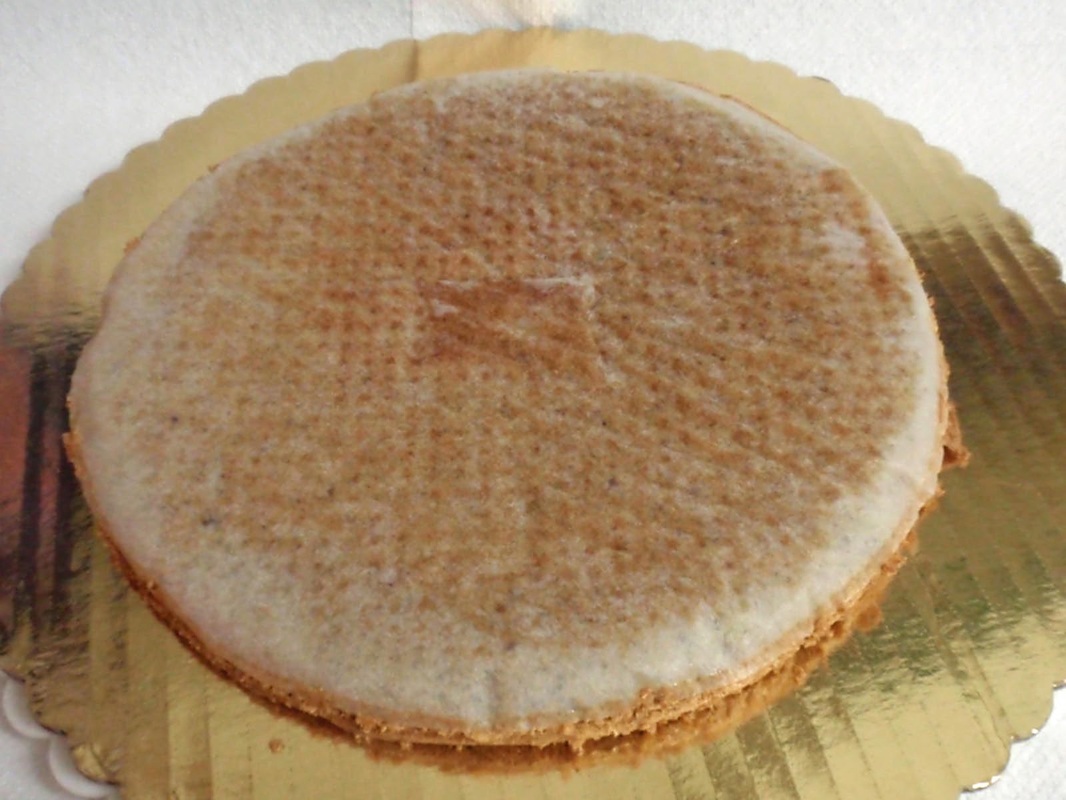
Choose your sturdiest torte layer to be the bottom layer. Flip it upside down onto the cake board (this isn't as scary as it may seem - put the cake board upside down on top of the torte layer, keep one hand on top, slip the other hand under the cooling rack and torte layer, and flip).
Try to center the torte on the board as you do this; you can adjust the centering a little after flipping, if needed.
(If you tear the torte layer a bit in the process, just try to patch it together as best you can - it'll all be covered by filling and topping by the end of the process anyway!)
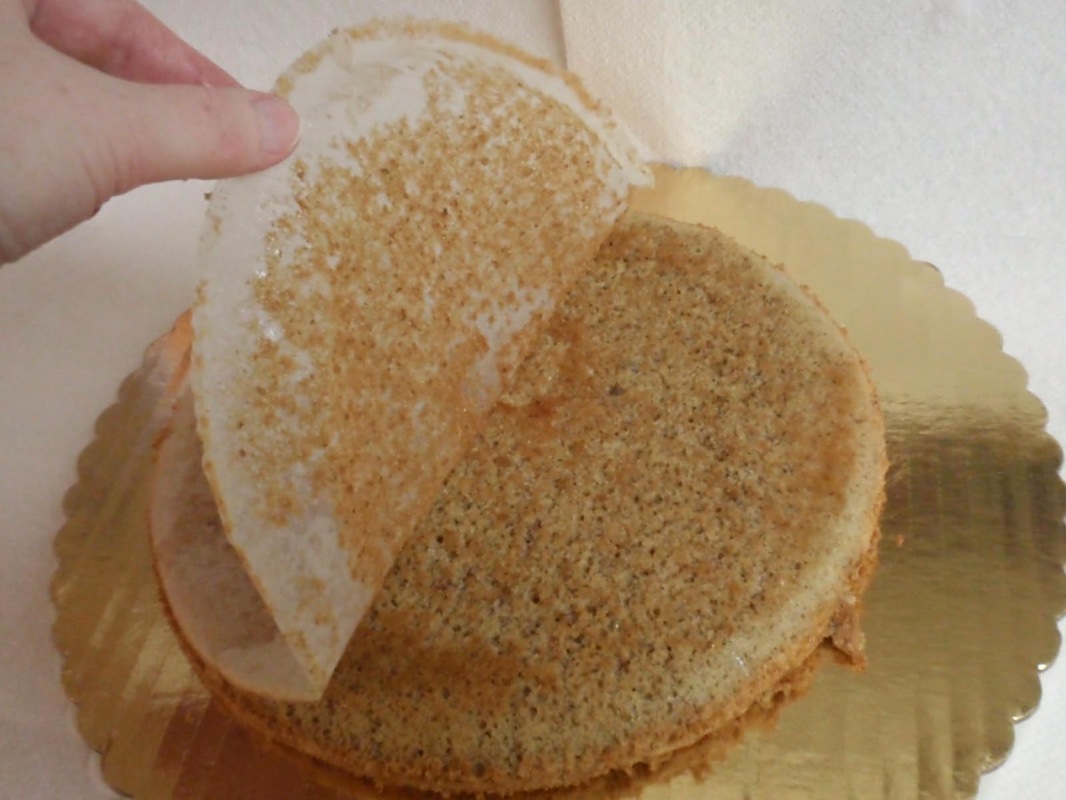
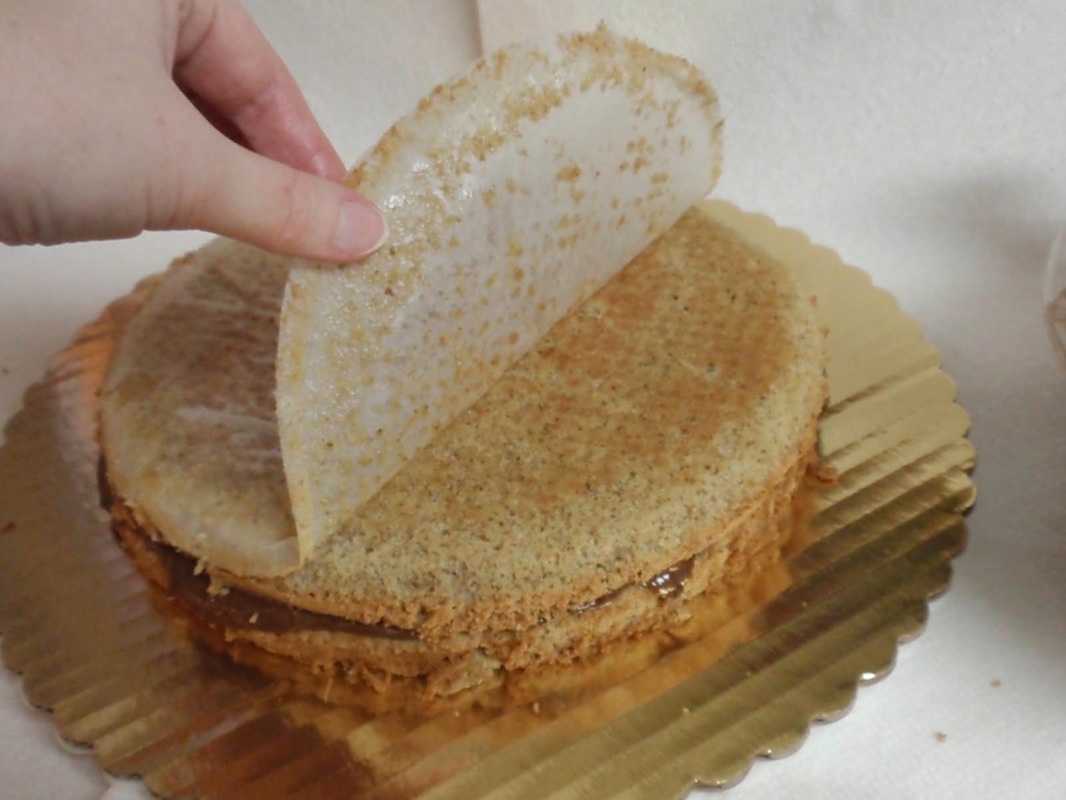
The parchment round is still attached to the base of the torte layer - it helps keep the torte layer intact, in this case. Once you have the torte layer where you want it on the board, gently peel back the parchment round and discard.
Now you can start putting in the filling.
Try to center the torte on the board as you do this; you can adjust the centering a little after flipping, if needed.
(If you tear the torte layer a bit in the process, just try to patch it together as best you can - it'll all be covered by filling and topping by the end of the process anyway!)
The parchment round is still attached to the base of the torte layer - it helps keep the torte layer intact, in this case. Once you have the torte layer where you want it on the board, gently peel back the parchment round and discard.
Now you can start putting in the filling.
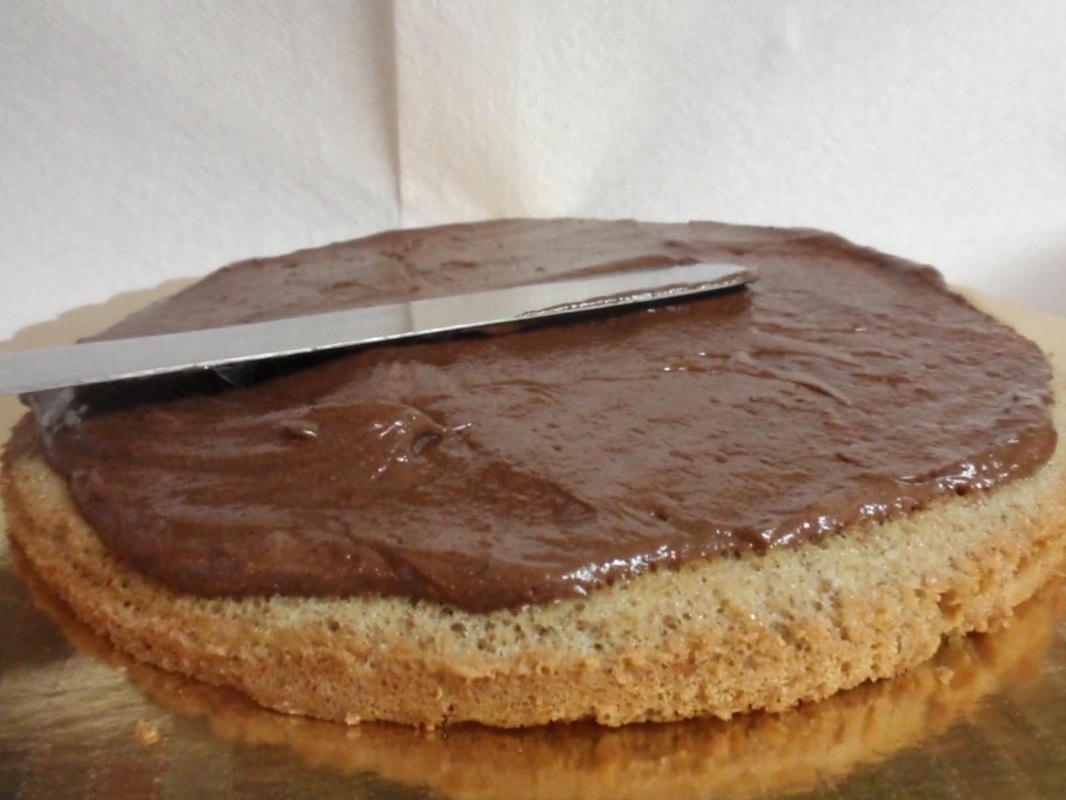

Put about 1/4 of your filling mixture onto the torte layer. Try to spread the filling as level as you can (you can correct any slight slope in the torte layer this way; this torte can't easily be cut to level it, the way cake layers can be).
I'm using a long, straight icing spatula in the first picture above, and that tool makes things easier:
http://www.wilton.com/store/site/product.cfm?id=3E31009B-475A-BAC0-5893DEA7B09E2C5D&killnav=1
Take the next torte layer and flip it onto the filling.
(You can't use the cake base this time, so either flip it just using your hands - it's sturdy enough! - or you can use a small cake round, thin cutting board, giant spatula, or something else large and flat and thin to do the flipping, and then gently ease the torte layer from whatever you're using onto the filling).
Adjust your centering as needed. Peel off the parchment round.
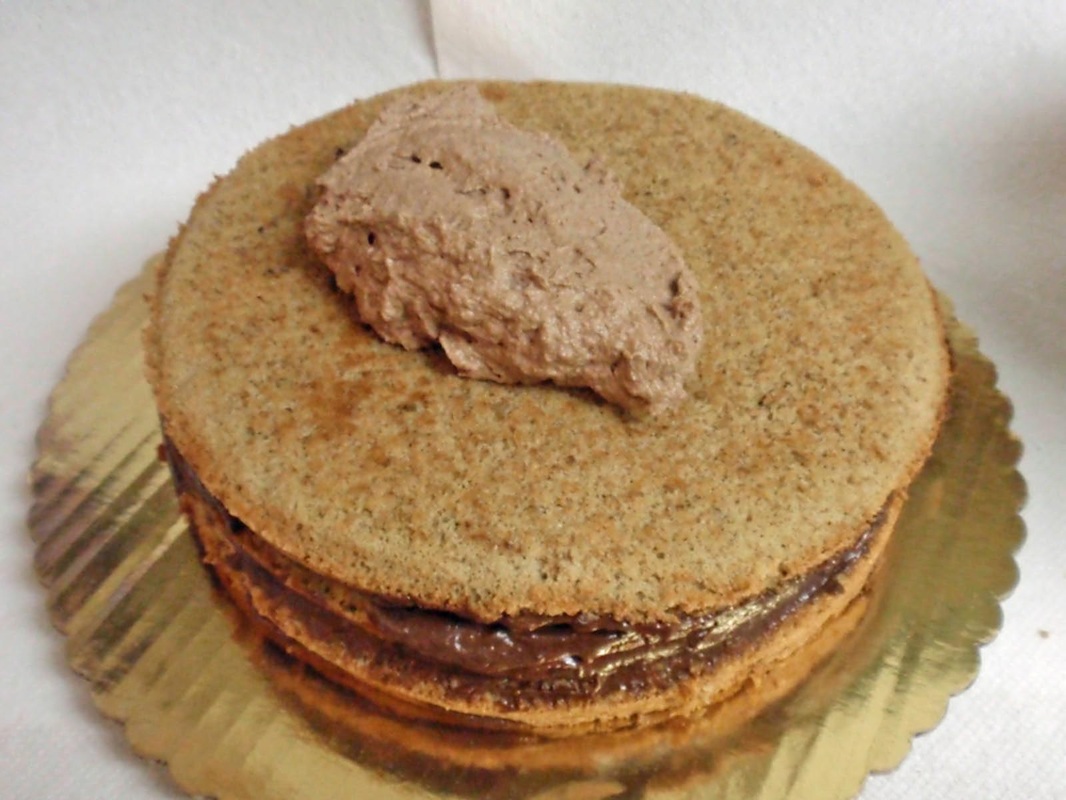
Put another 1/4 filling onto the second torte layer, spread evenly, repeat with the third torte layer and another 1/4 of the filling. Put the fourth torte layer on top, and stop.
You can clean up any filling spilling over the sides now. If you like, you can put the torte into the refrigerator to chill while you make the topping (if it's hot and the torte layers are slip-sliding around, insert some toothpicks from the top to hold the layers in place, and chill to set the filling).
Now you can move on to putting together the topping.
I'm using a long, straight icing spatula in the first picture above, and that tool makes things easier:
http://www.wilton.com/store/site/product.cfm?id=3E31009B-475A-BAC0-5893DEA7B09E2C5D&killnav=1
Take the next torte layer and flip it onto the filling.
(You can't use the cake base this time, so either flip it just using your hands - it's sturdy enough! - or you can use a small cake round, thin cutting board, giant spatula, or something else large and flat and thin to do the flipping, and then gently ease the torte layer from whatever you're using onto the filling).
Adjust your centering as needed. Peel off the parchment round.
Put another 1/4 filling onto the second torte layer, spread evenly, repeat with the third torte layer and another 1/4 of the filling. Put the fourth torte layer on top, and stop.
You can clean up any filling spilling over the sides now. If you like, you can put the torte into the refrigerator to chill while you make the topping (if it's hot and the torte layers are slip-sliding around, insert some toothpicks from the top to hold the layers in place, and chill to set the filling).
Now you can move on to putting together the topping.
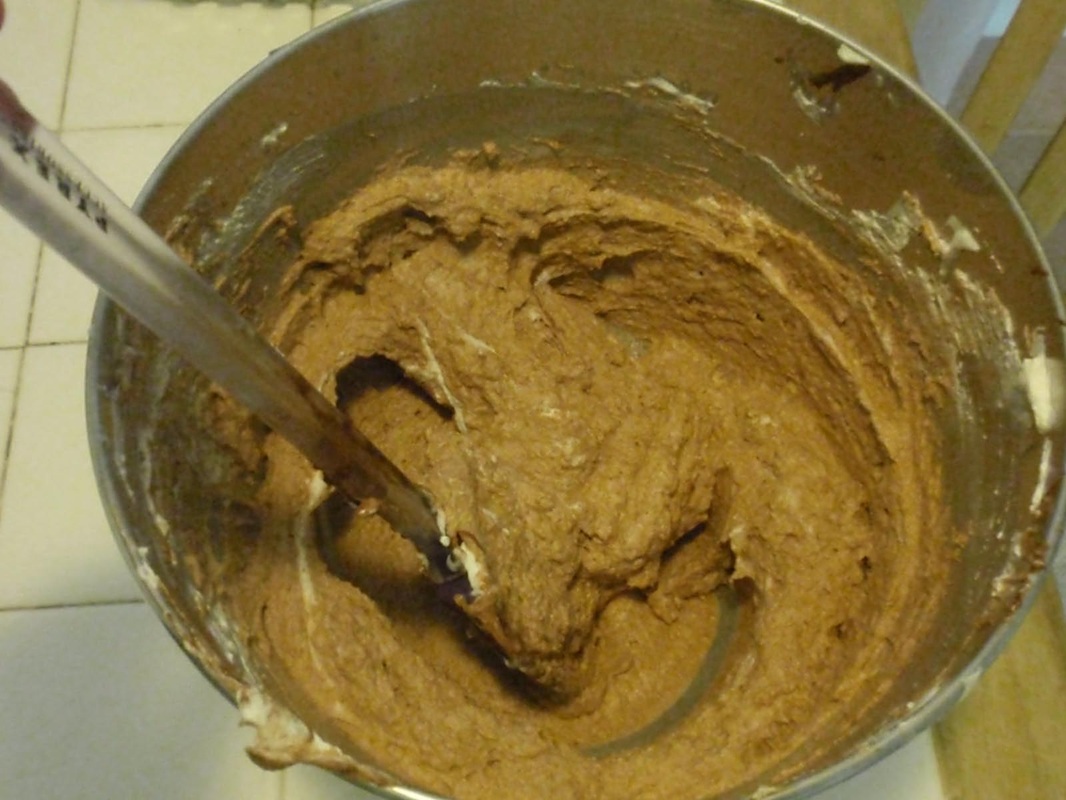
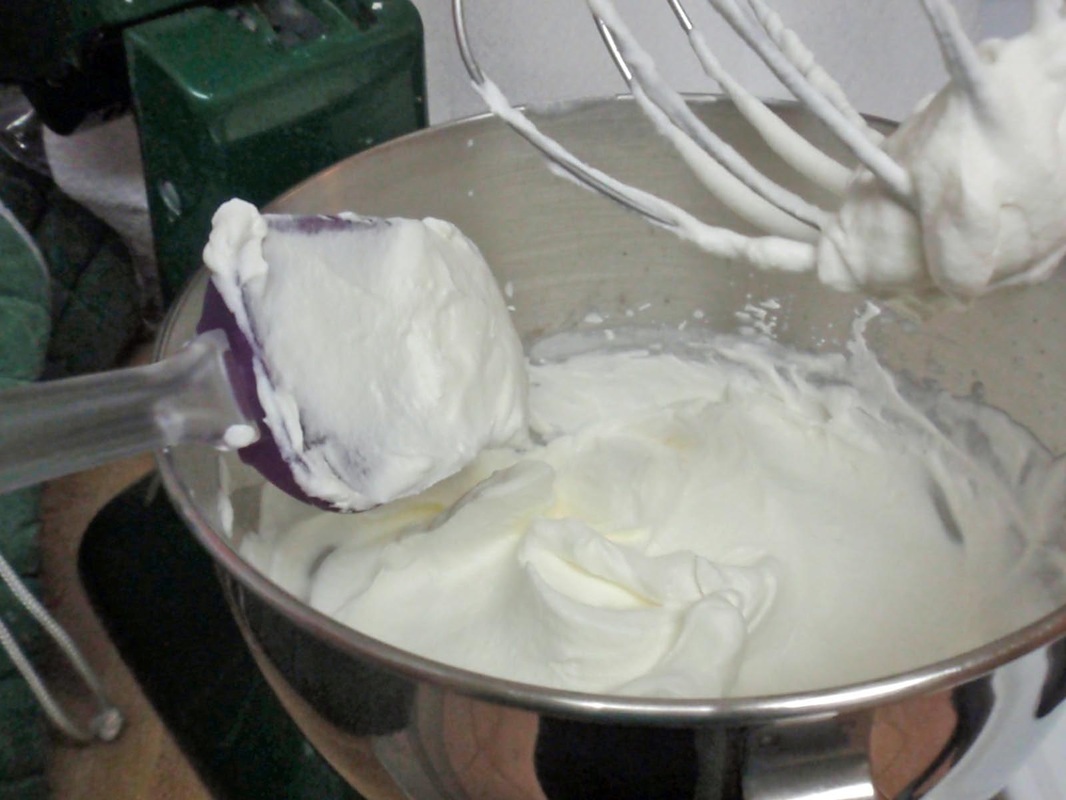
You should have about a quarter of your filling left (first photo above).
Take the remaining 1 cup of heavy whipping cream, and whip it to stiff peak stage. Gently mix in the remaining filling (you can use your mixer at the very lowest speed). The final result is lighter in color and texture than the filling, but still has that chocolate-praline flavor.
The next step is covering, or "icing" your torte. You can apply the topping simply, maybe swirl it with the back of a spoon, and then decorate.
I like a smooth and even effect, and I'm including the photos of the process below. You may also want to look at Wilton's video on icing a cake: http://www.wilton.com/decorating/icing/using-a-spatula.cfm

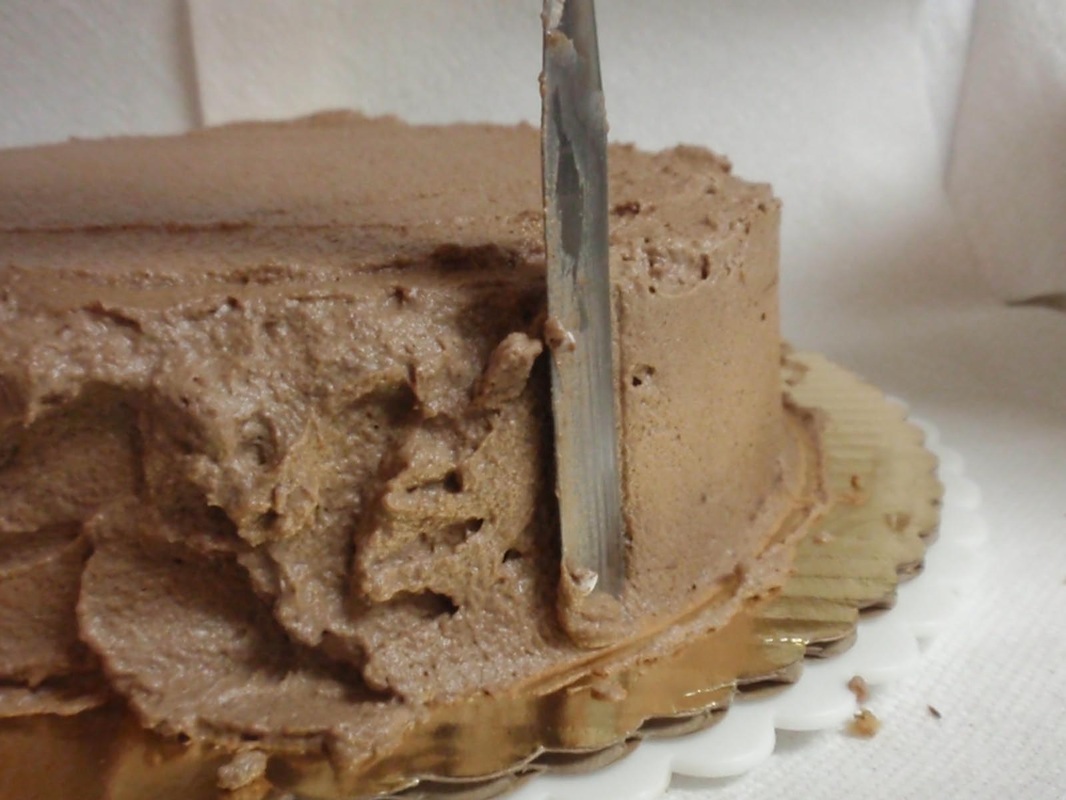
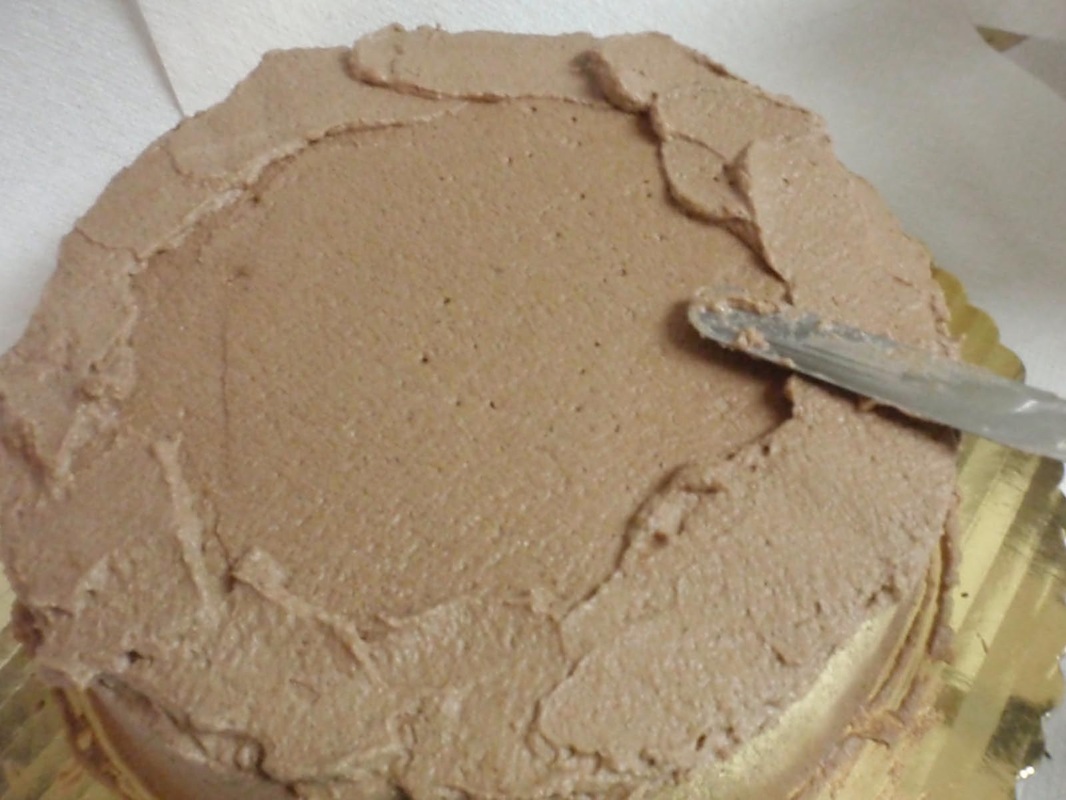
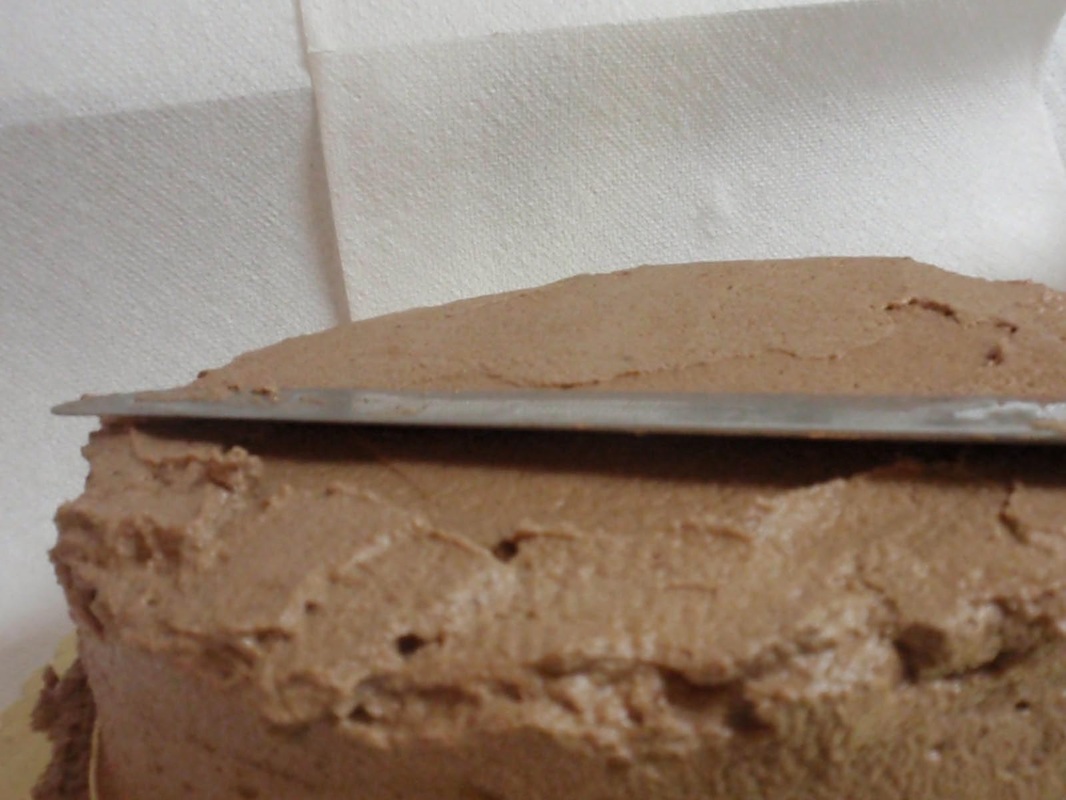


Apply topping to the torte top first, spread and smooth it out. Then use a short icing spatula to apply topping to the sides, and smooth. Go back to the top, add topping where needed to make it level (usually it slopes down along the periphery), smooth again.
Icing a cake is a bit like spackling - apply more than you need, and take away excess with your spatula to achieve that straight and level effect.
Smooth the sides again. Keep going until you're satisfied.
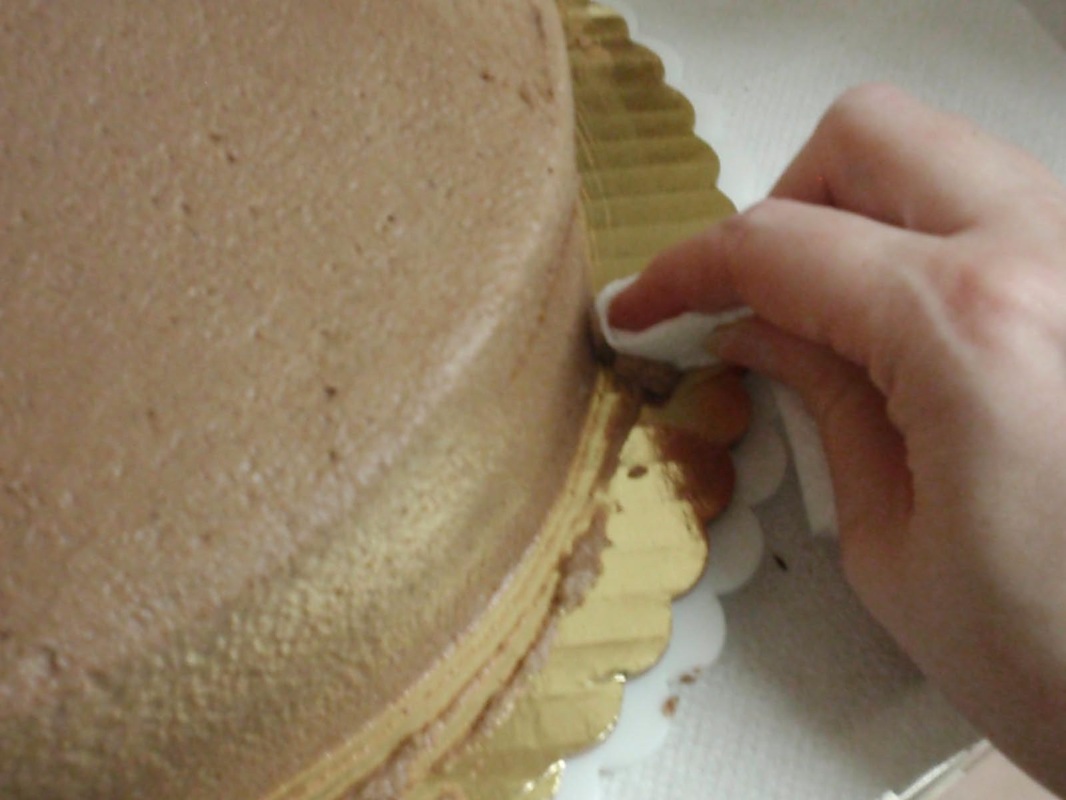
Then use a paper towel to clean up the cake board surface.
Finally, you have a smooth canvas to decorate as you like.
I like to use borders around the top and bottom edges of my tortes. Here I'm using chocolate buttercream in a rope border (you can make this border using stabilized whipped cream too).
You can look at the Wilton website for the rope technique:
http://www.wilton.com/technique/Rope
but it really helps to take a Wilton cake decorating class (at a craft shop like Michael's or JoAnn's; also, Wilton just started introducing Craftsy classes, which you can take online for a fee).
Icing a cake is a bit like spackling - apply more than you need, and take away excess with your spatula to achieve that straight and level effect.
Smooth the sides again. Keep going until you're satisfied.
Then use a paper towel to clean up the cake board surface.
Finally, you have a smooth canvas to decorate as you like.
I like to use borders around the top and bottom edges of my tortes. Here I'm using chocolate buttercream in a rope border (you can make this border using stabilized whipped cream too).
You can look at the Wilton website for the rope technique:
http://www.wilton.com/technique/Rope
but it really helps to take a Wilton cake decorating class (at a craft shop like Michael's or JoAnn's; also, Wilton just started introducing Craftsy classes, which you can take online for a fee).

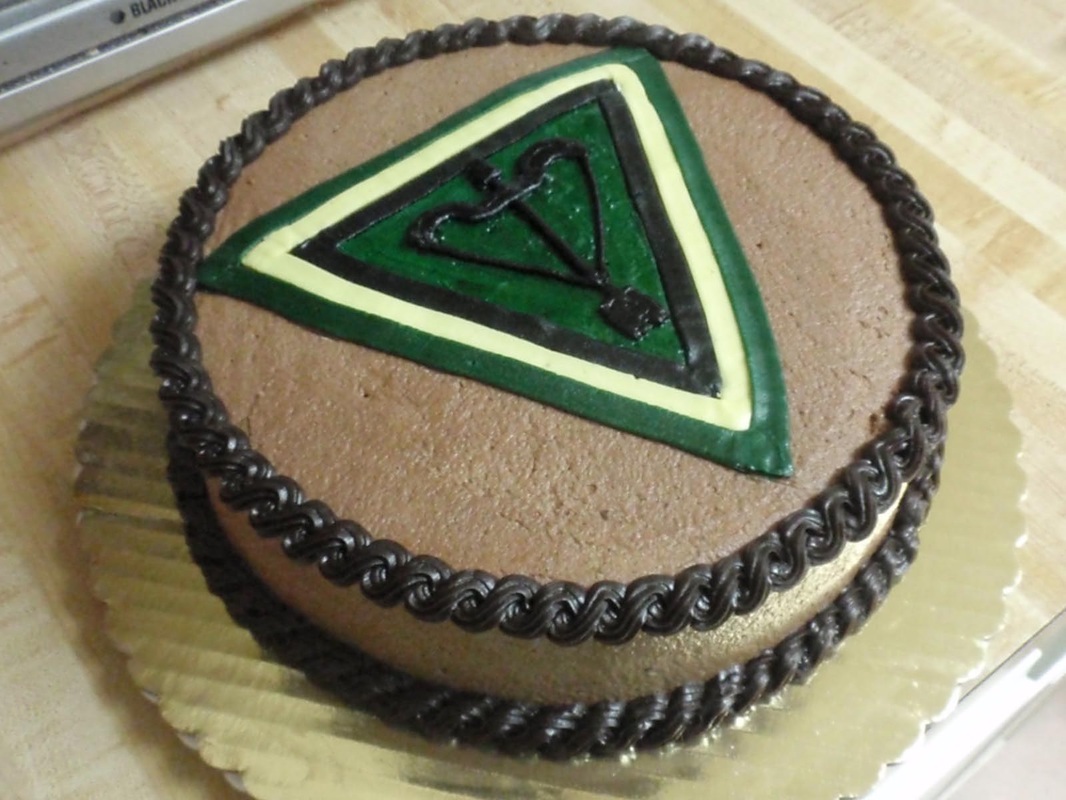
The decoration I made for this customer is a "Luk i Strila" (bow and arrow) insignia of the Plast group Pershi Stezhi. I used buttercream here, but another possibility would have been coloring and cutting out marzipan (or fondant, but I don't like the taste).
Good luck with your own torte! It's worth the effort!
But if it's too overwhelming, you can pre-order a torte from us! Don't wait too long, though - our tortes sell out quickly!
Good luck with your own torte! It's worth the effort!
But if it's too overwhelming, you can pre-order a torte from us! Don't wait too long, though - our tortes sell out quickly!
 RSS Feed
